ISTU/DC System is an e-learning LMS (Learning Management System) that supports all courses offered at Tohoku University (university-wide education courses, specialized undergraduate courses, and graduate courses).
ISTU is an e-learning LMS (Learning Management System) that supports all courses offered at Tohoku University (general education courses, specialized undergraduate courses, and graduate courses). It is also the platform for Tohoku University Internet School.
ISTU is designed not only to support face-to-face classes but also to be used for online education. ISTU is designed not only to support face-to-face classes, but also to be used for online education, so it is equipped with various functions such as viewing various digital learning materials and sending/receiving report assignments.
In this section, only some of the operations are explained, focusing on how to register learning materials.
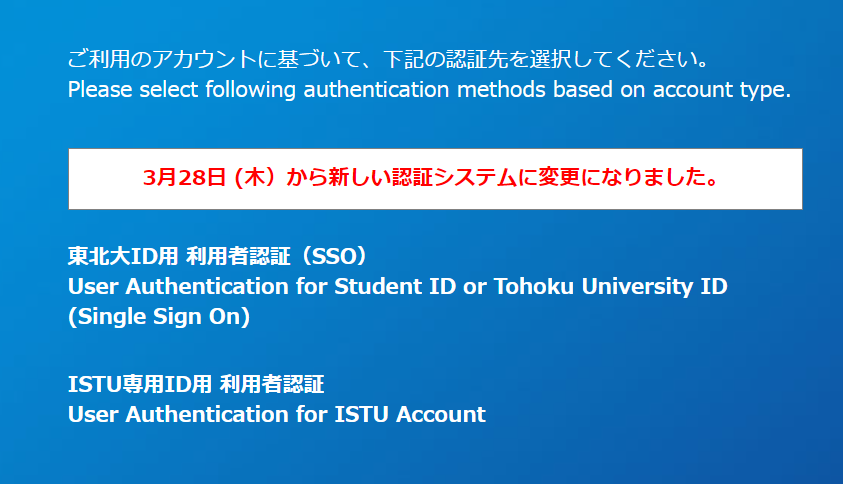
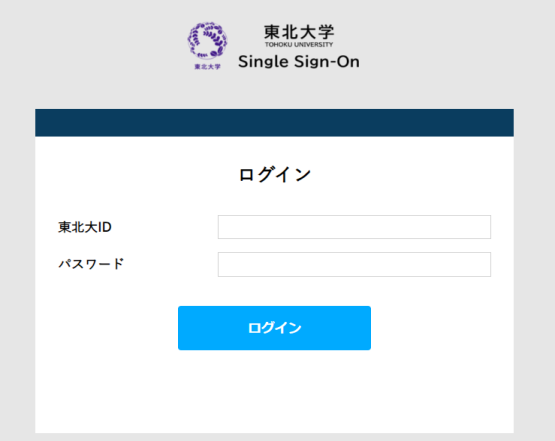
① Click User Authentication for Student ID or Tohoku University ID
② Enter your Tohoku University ID in [ID] and the corresponding password in [Password].
※When you access from off-campus, the page to select the authentication methods is displayed.
※To perform the authentication with a Single Sign-On, pre-registration is necessary from on-campus network. For details, please refer to "click here".
Have an ISTU ID
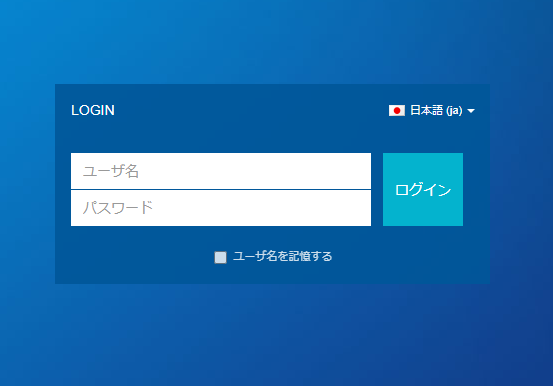
① Click User Authentication for ISTU Account to display the login screen.
② Enter your ISTU ID in [ユーザ名] field and the corresponding password in [パスワード] field.
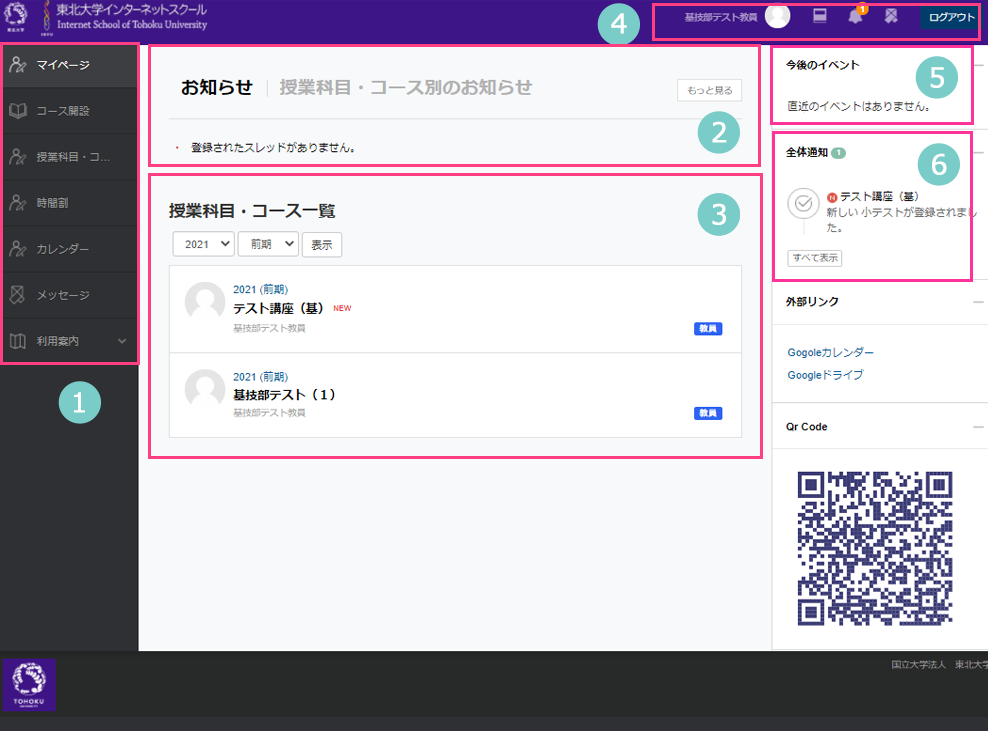
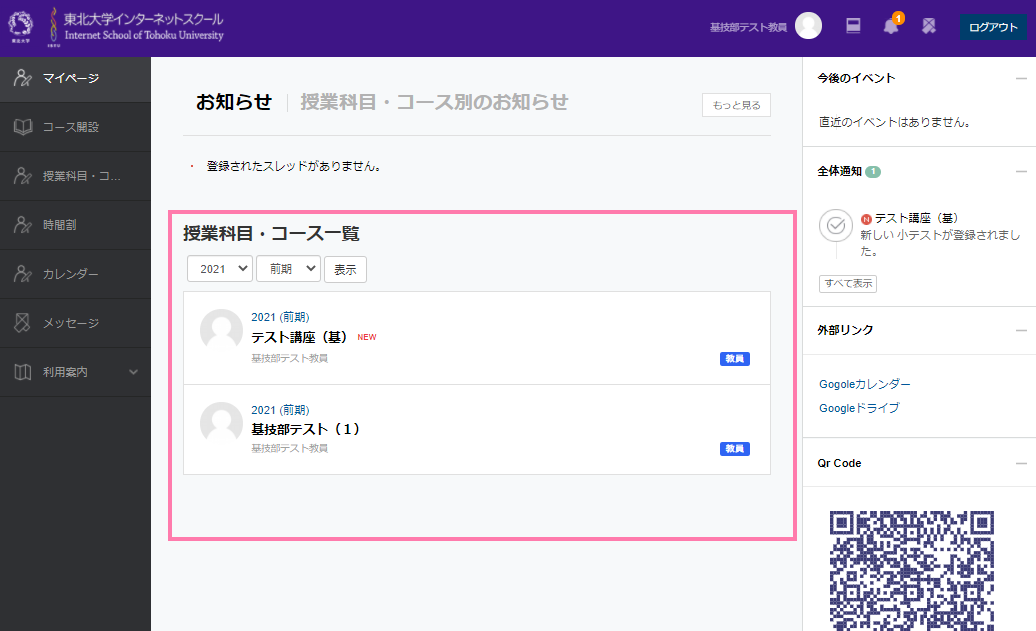
After completing the login process of the ISTU/DC system, the top page of My Page will be displayed.
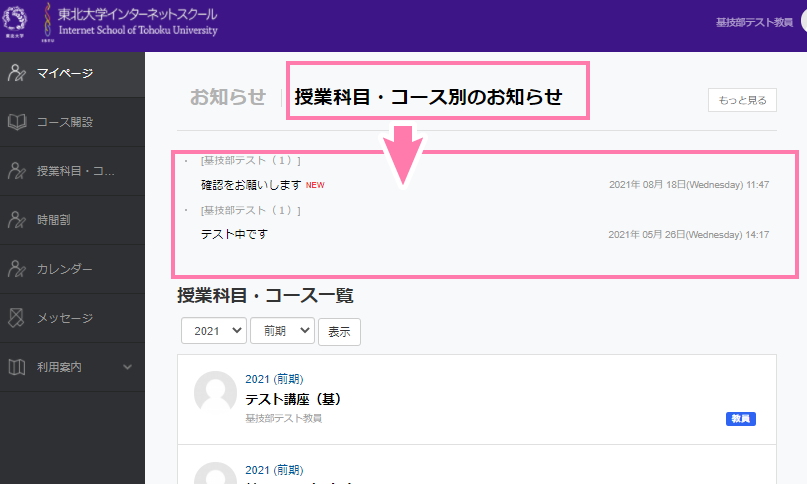
① Common menu
◆マイページ My Page
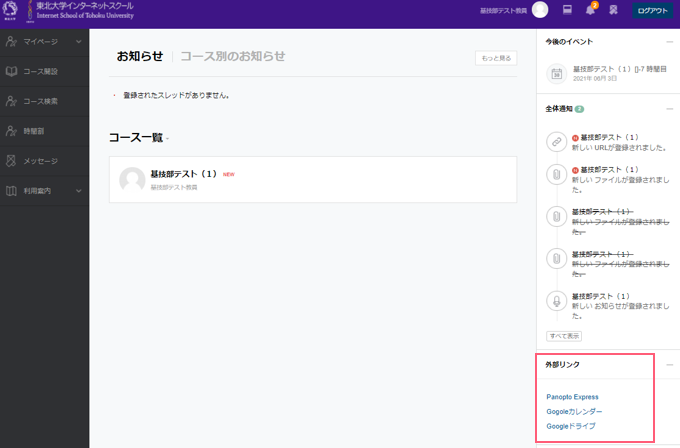
You can view announcements, class and course specific announcements, registration information, calendar and upcoming events.
◆コース開設 Course Creation
You can create your own courses that are not available in the Academic Affairs Information System.
◆授業科目・コース検索 Course Search
View and search all classes and courses on ISTU.
◆時間割 Time Schedule
Displays the classes and courses you are currently enrolled in in a timetable format.
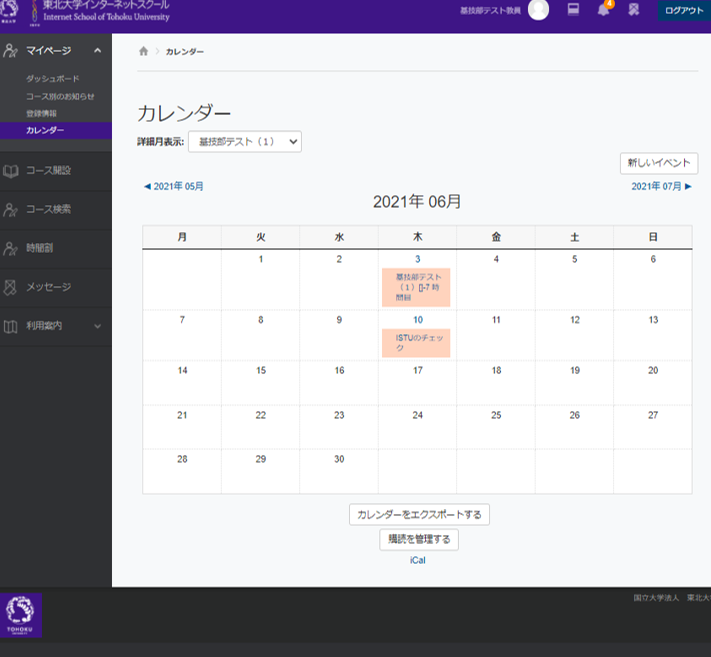
◆カレンダー Calendar
Displays test due dates, assignment due dates, and other information in a calendar format.
◆メッセージ Messages
You can view the history of messages sent and received.
◆利用案内 Usage guide
Displays Q & A and manuals.
②Announcements
You can check the announcements for the entire site, or for each class or course. Either one of the selected announcements will be displayed. Please note that they will not be displayed together.
③List of Classes/Courses
All classes and courses in which you are participating as a faculty member or student will be displayed.
④Login Information
1
The logged in user will be displayed. Clicking on the icon will show you where you can change your language and personal information.
2
You can view a list of courses you are enrolled in.
3
You will receive notifications when new files, Quiz, assignments, etc. are added to the course you are participating in, and the number of unread items will be displayed in the upper right corner of the icon. The number of unread messages is displayed in the upper right corner of the icon.
4
When you receive a message, the number of messages you have read will be displayed in the upper right corner of the icon. You can view unread messages by clicking on them.
5
Log out from ISTU.
⑤Upcoming Events
Displays upcoming events, such as test and survey due dates, assignment submission deadlines, etc. (Up to 5 events)
Clicking "More Events" will bring up a calendar screen where you can see all the events.
⑥Overall notifications
Unread notifications received in the last week are displayed. (Maximum 5)
Click "Show All" to see all the unread notifications.
In addition, external links (such as links to Google Calendar) and Qr Code are displayed.
Additional Information: About "Courses" and "Materials"
Course
A "コース(course)" is a unit of credit consisting of 15 "lessons" in a semester, or about 30 lessons in a full year.
It is usually created automatically after the start of the semester,
based on data from the Student Affairs Information System.
If you want to start preparing before the start of the semester,
or if you want to set up your own courses on the ISTU system that are not in the data of the Academic Affairs Information System,
you can create courses on the ISTU system by yourself.
Course Structure and Teaching Materials
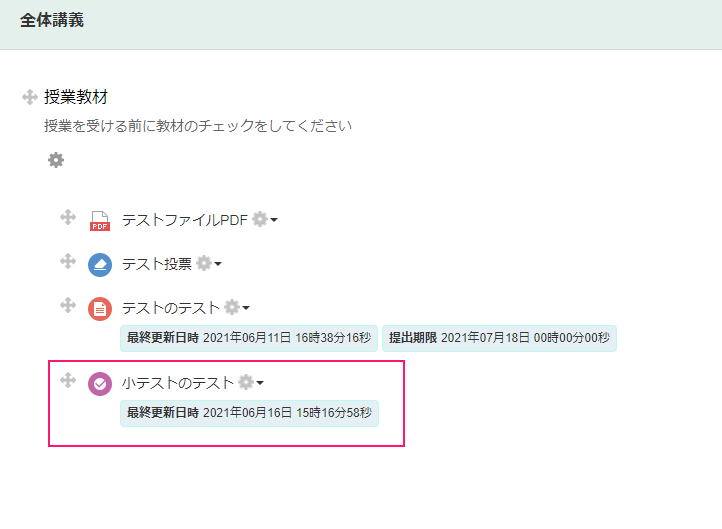
In the course, there are "セクション(sections)" called "講座の概要(Course Outline)" and "全体講義(Plenary Session)". Teachers and TAs can use the Default Board and add various teaching "教材(materials)" (handouts, videos, Quiz, assignments, questionnaires, etc.). The default number of sections is "1", but it can be increased.
Normally, each course is accessible only to participants, and the materials are available only to participants, but you can register "public content" that can be viewed by all ISTU users.
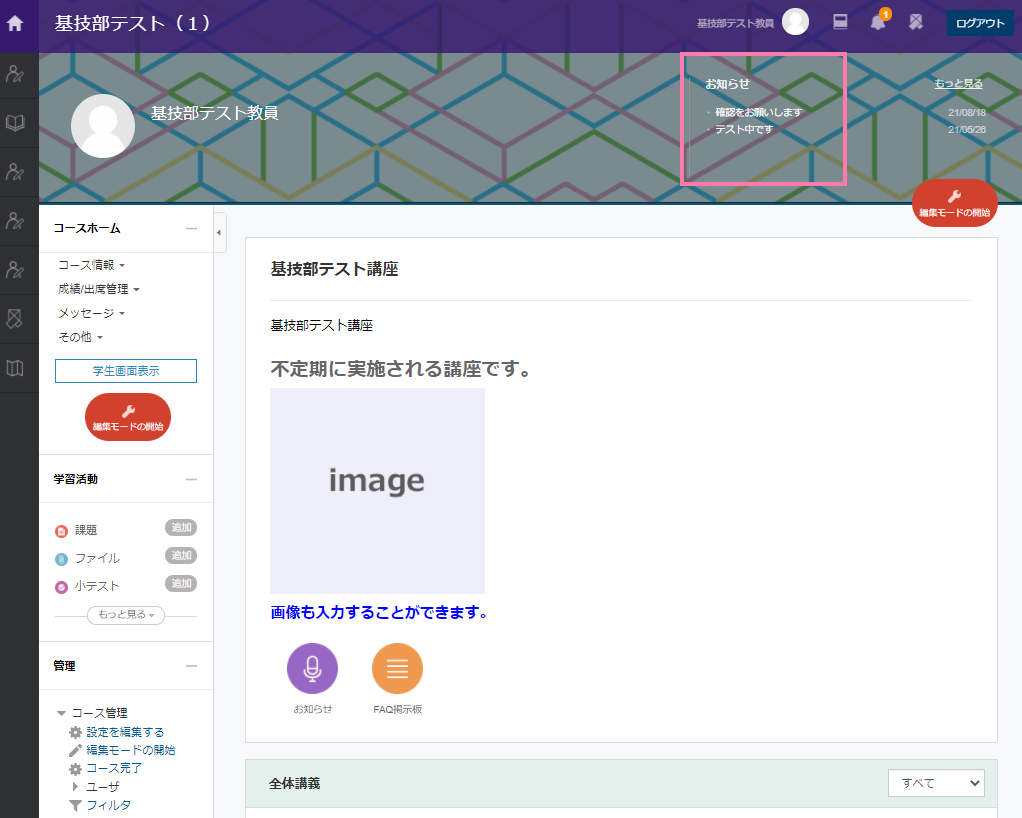
The screen on which announcements and course materials are displayed for each course is called "Course Home. It is usually created automatically after the semester starts, based on data from the Student Affairs Information System.
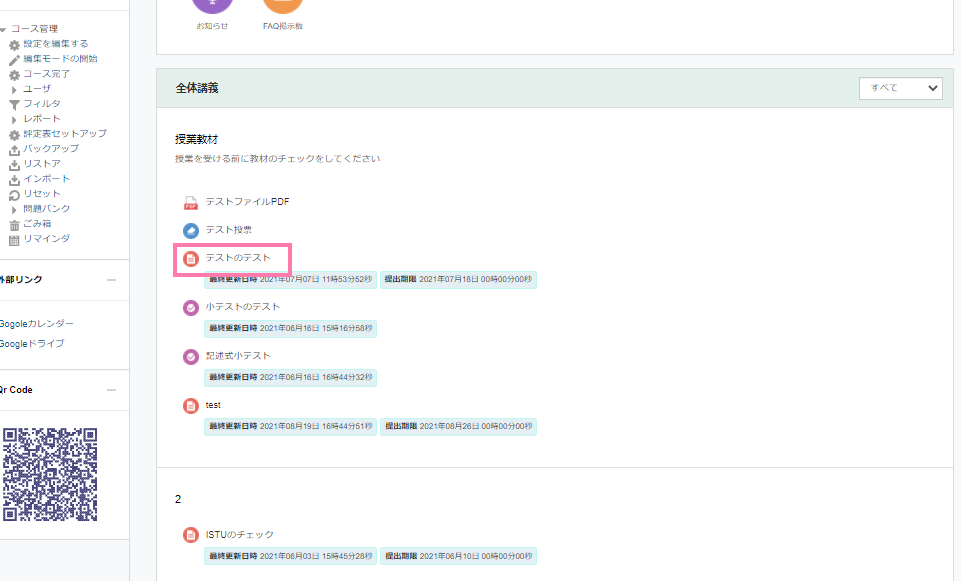
Click on any course from the list of classes and courses.
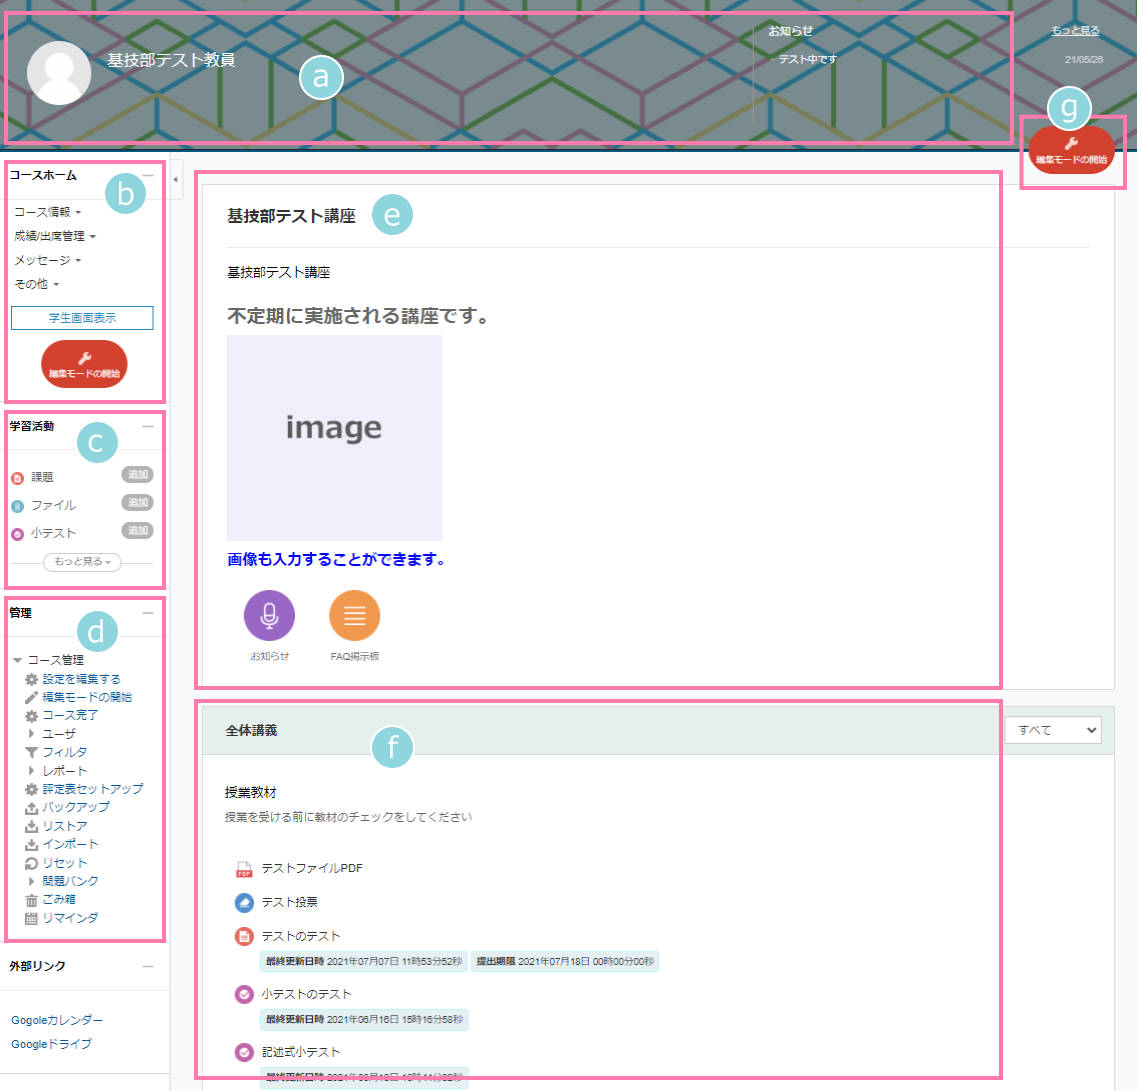
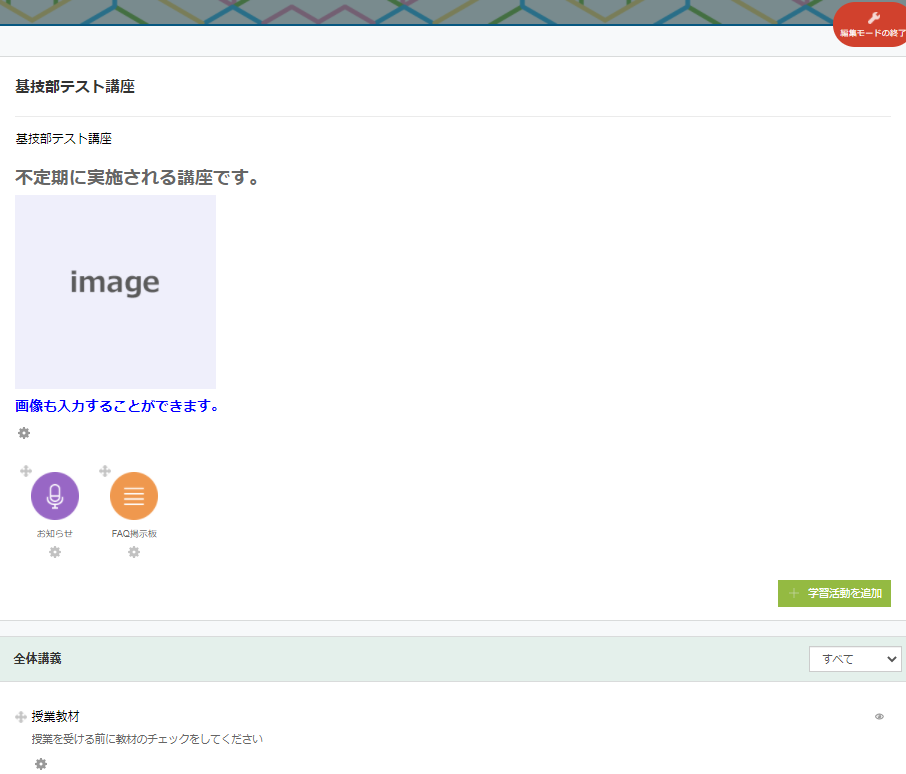
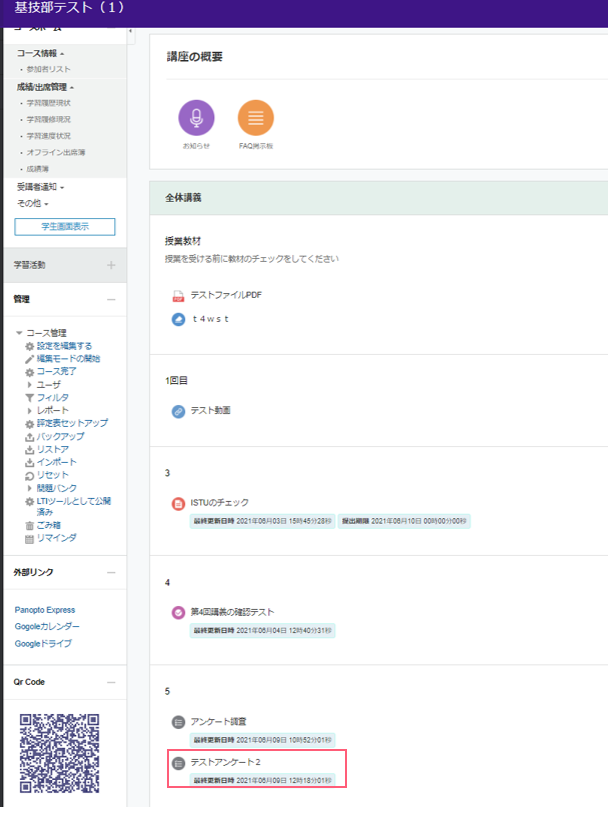
You will be taken to the Course Home screen, where you can view announcements, course materials, etc. for the selected class.
Course name and instructor information and announcements
Course Home Menu
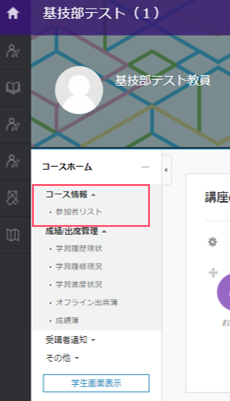
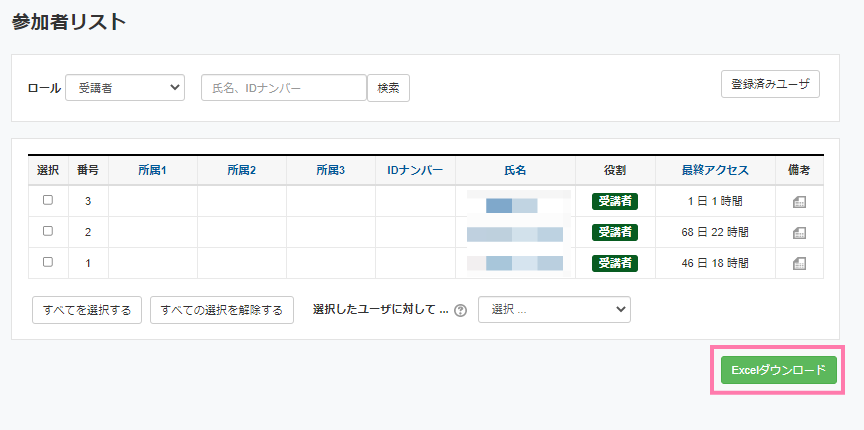
Course Info
Displays a list of participants.
Grades/Attendance
Management Displays the current learning history/offline attendance/grade book.
Messages
ou can send messages and emails to course participants.
Others
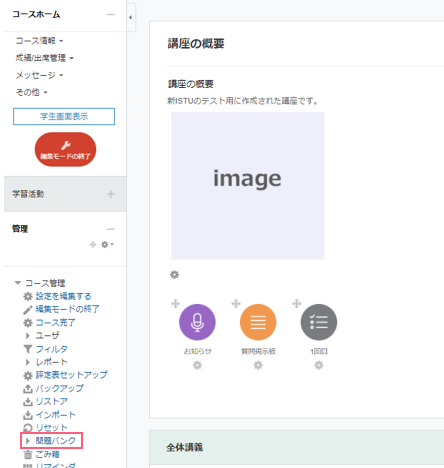
You can view course settings/group management/group members/question bank/course records/management of course criteria.
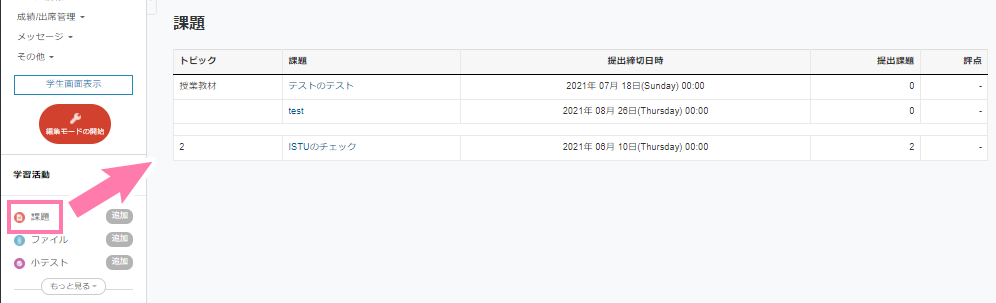
Learning Activities You can register assignments, Quiz, questionnaires, etc. and view registered learning materials by type.
Administration You can view the administration items of the screen you are viewing.
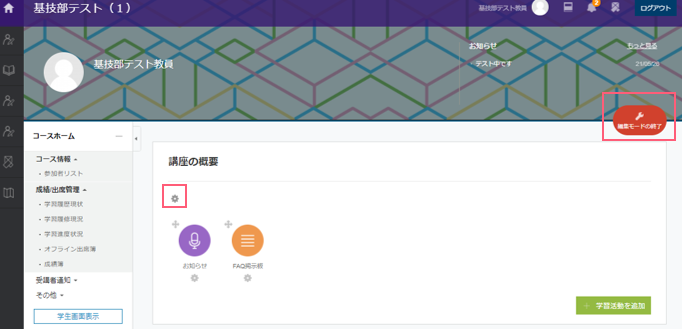
Course Outline Displays an overview of the course. Notices are automatically generated. You can register a variety of teaching materials.
Edit Mode Button To edit a course or add materials, click Turn editing on(編集モードの開始) button. When you are finished editing, click "Turn editing off(編集モードの終了)".
Sup.
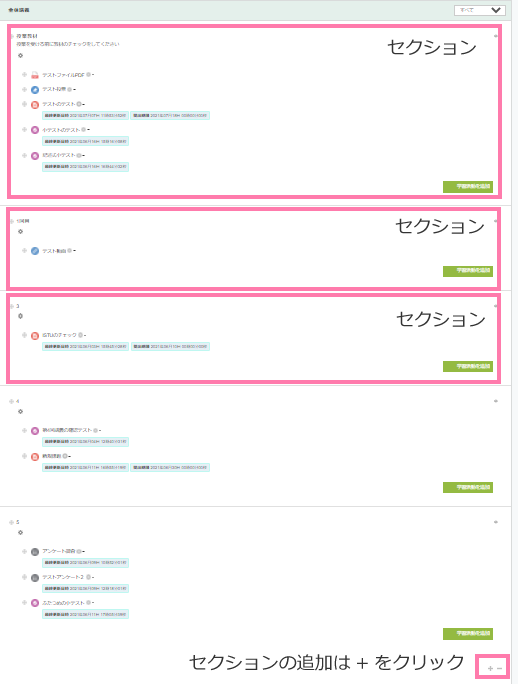
When in edit mode, an add button will appear in each section.
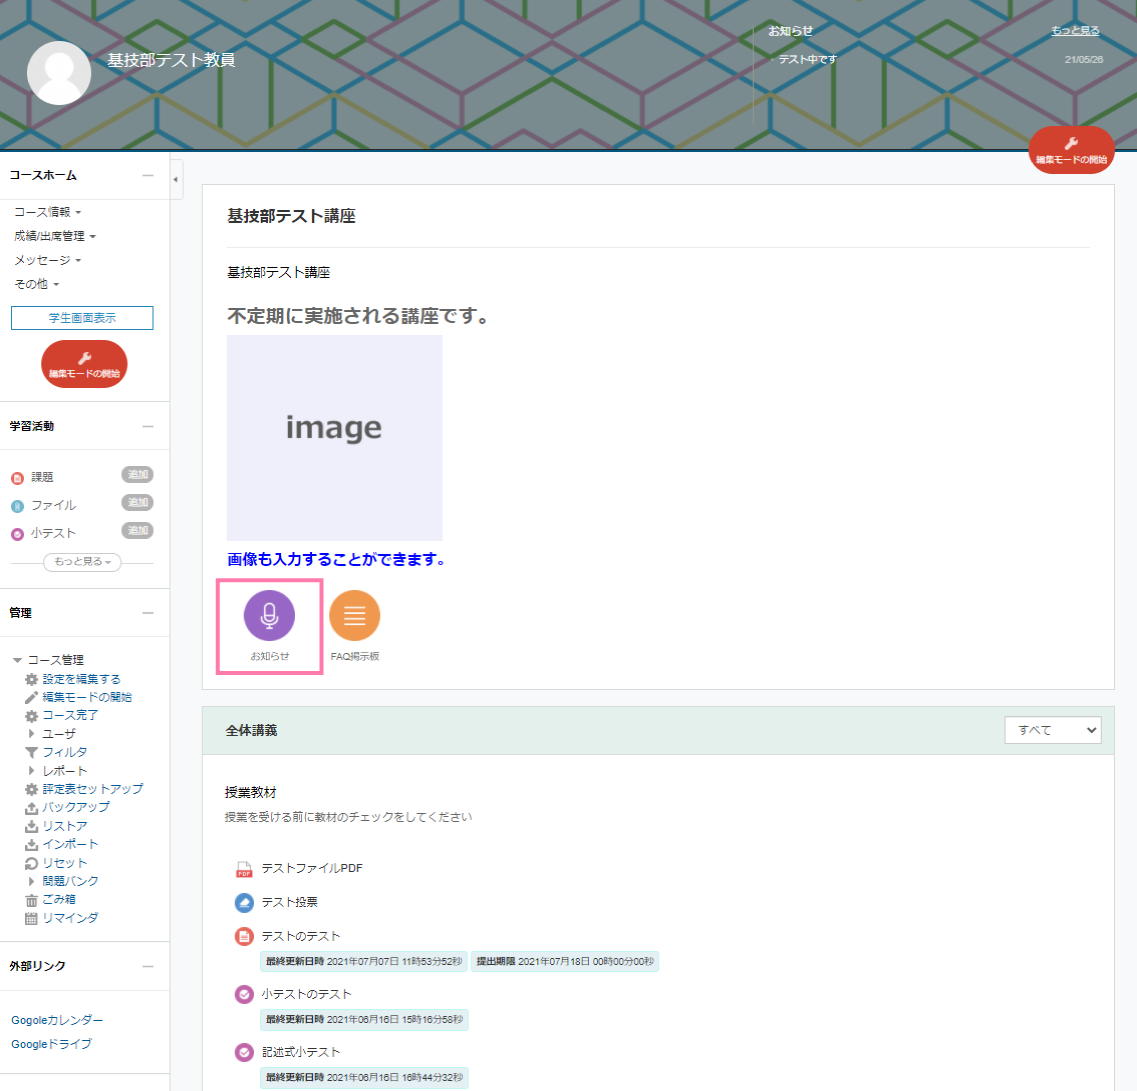
A Default Board for announcements will be automatically opened in the course outline. You can register announcements for students in this Default Board.
Click on the announcement(お知らせ)
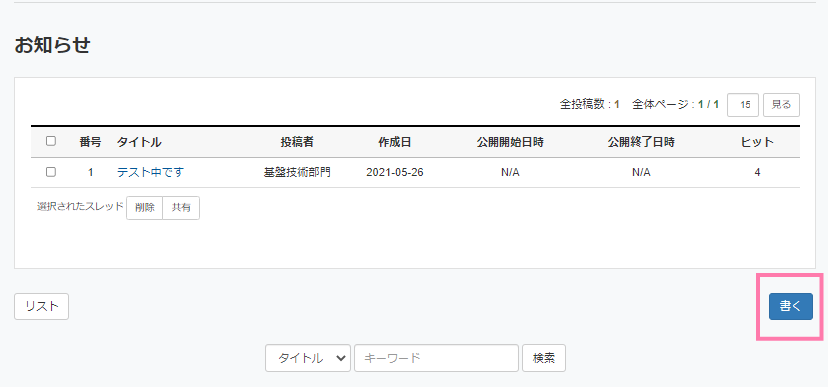
Click the Write button(書く).
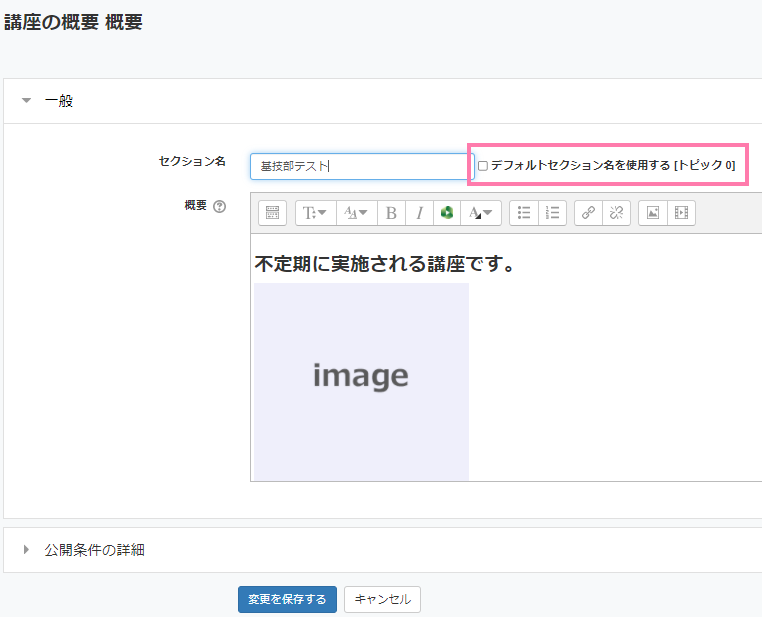
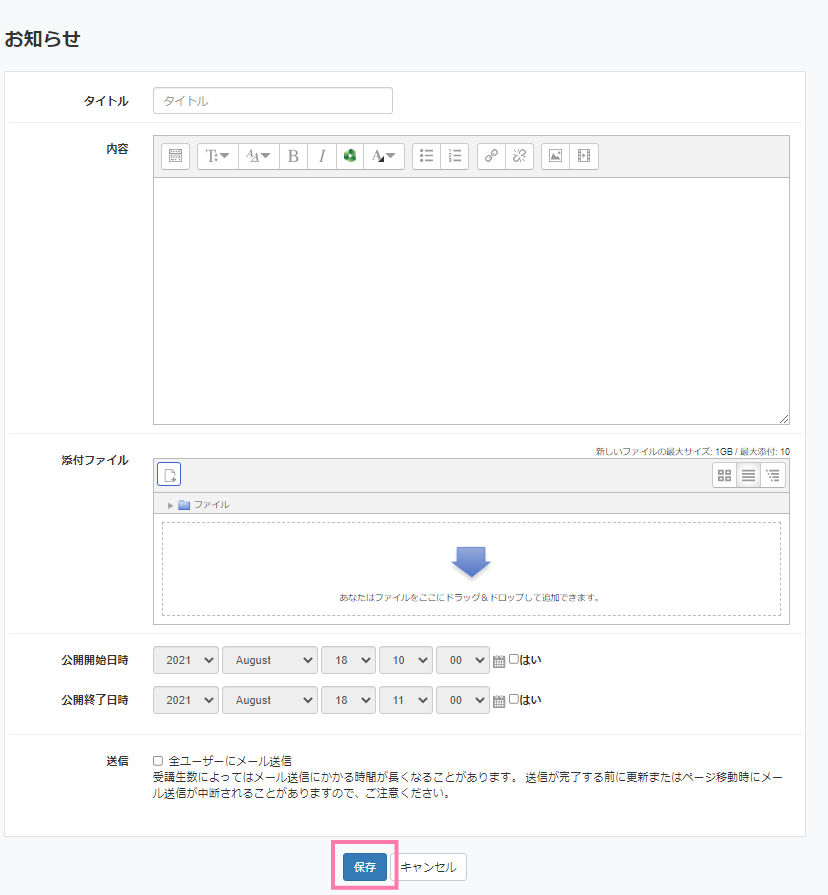
Enter the title, content, etc., and click Save(保存).
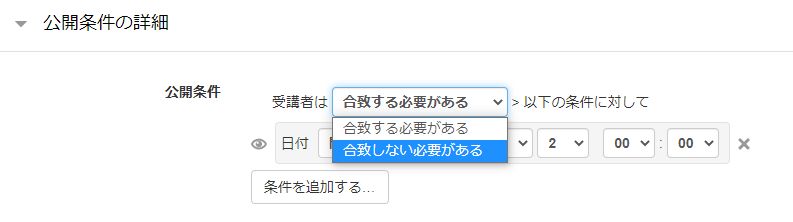
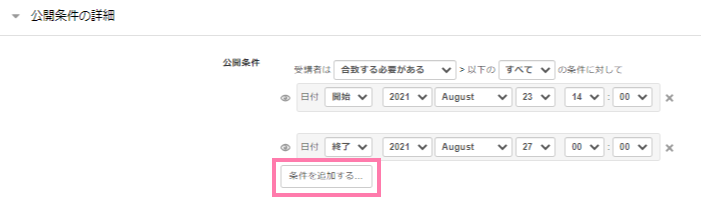
Check "Yes(はい)" if you want to set the start and end date and time of the publication of the announcement.
Please keep in mind that 「Send e-mail to all users(全ユーザーにメール送信)」 will send an email when you click on "Save", regardless of whether you have set Announcement start date or not.
The following is where the notifications are displayed.
You can register teaching materials to be used in class.
New Registration
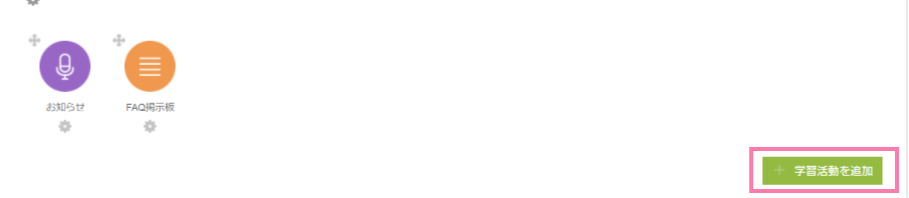
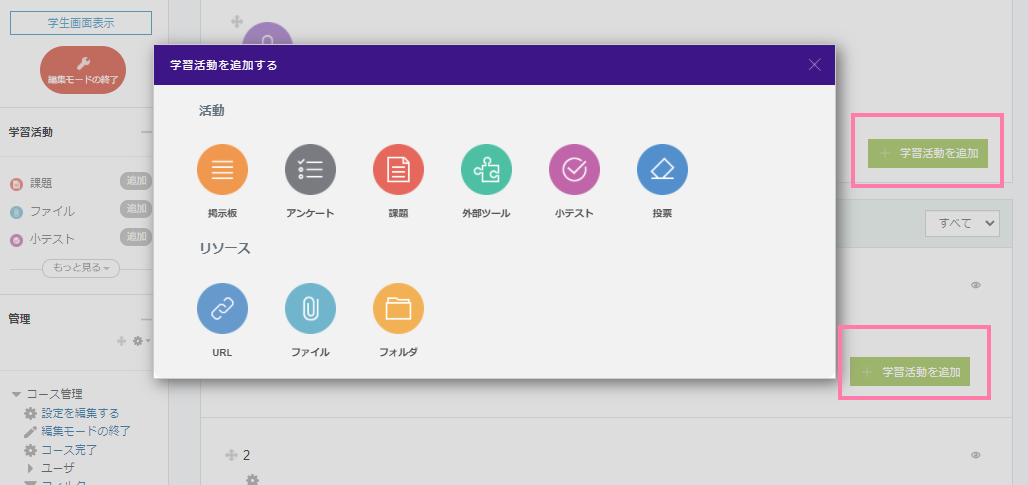
To register learning materials, click Turn editing on (編集モードの開始) to enter edit mode.
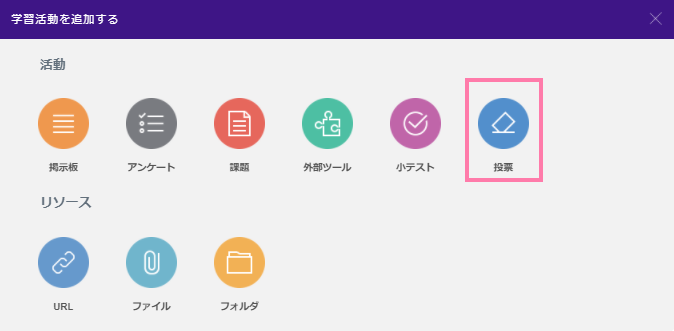
Click the Add Learning Activity(学習活動を追加) button in the section where you want to add learning materials, and select the icon of the material you want to register.
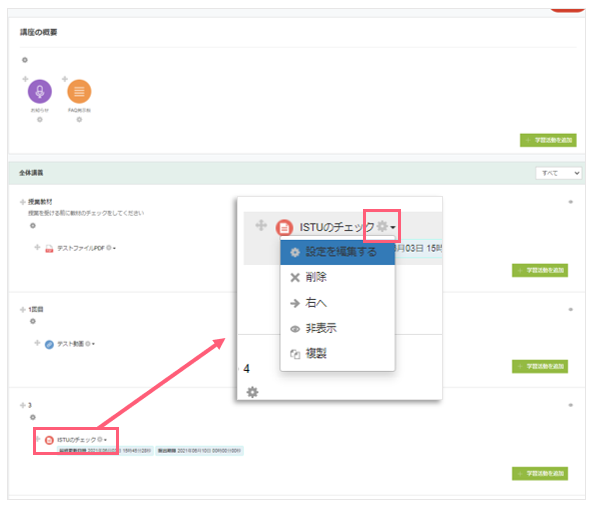
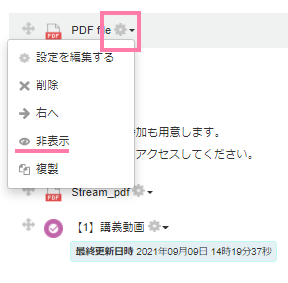
Click Turn editing on (編集モードの開始)to enter edit mode.
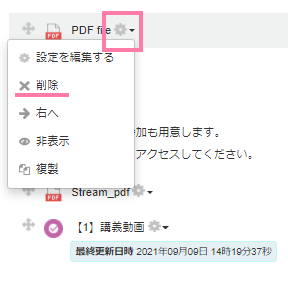
Click the Edit (編集)button for the material or activity you want to edit, and select Edit Settings(設定を編集する).
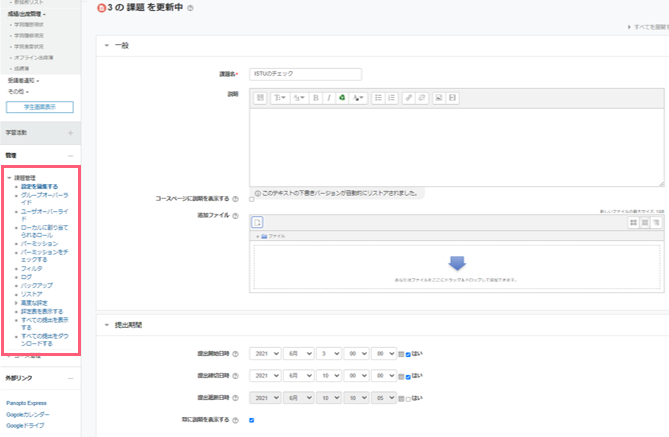
When the editing screen of the selected material or activity is displayed, it can also be operated from the administration menu in the lower left corner.
Teachers and TAs can add a Default Board and use it as a communication tool among learning participants.
The Default Board can contain URL links and file attachments, and articles posted on the Default Board can be deleted by the poster, the instructor, or the TA.
Click Turn editing on (編集モードの開始) to enter edit mode.
Click the Add Learning Activity (学習活動を追加)button for any section.
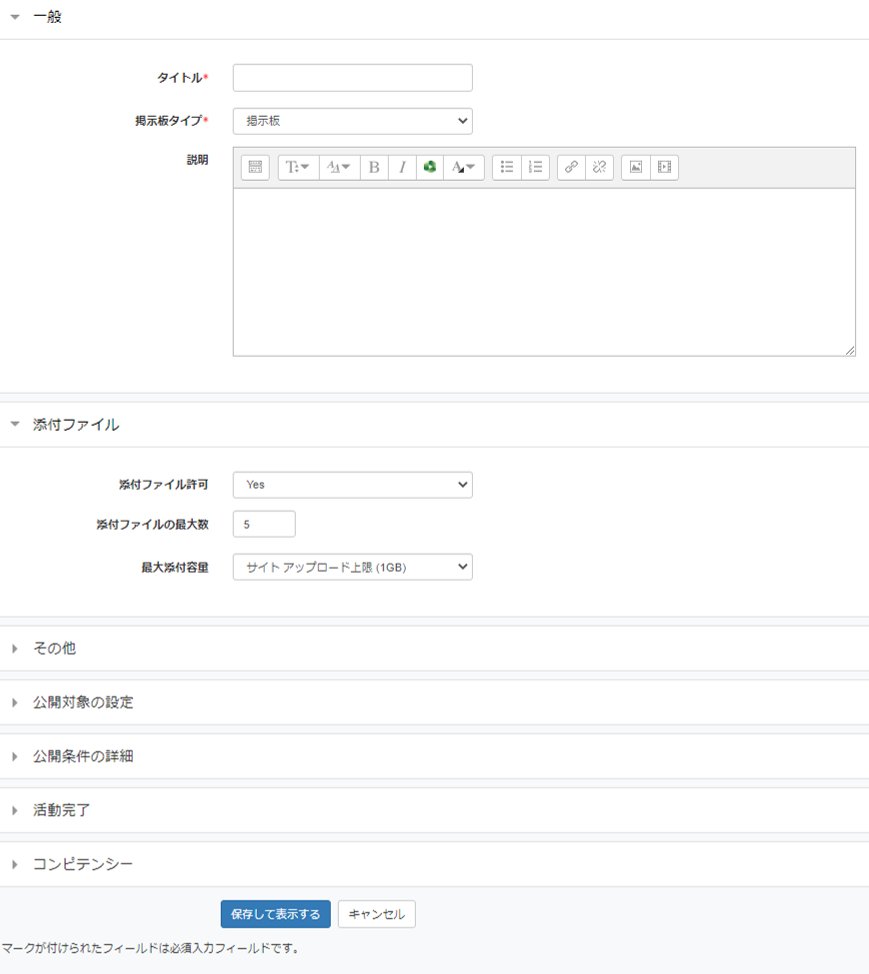
Click on Default Board(掲示板).
Fill in the required information and click Save and Display(保存して表示する).
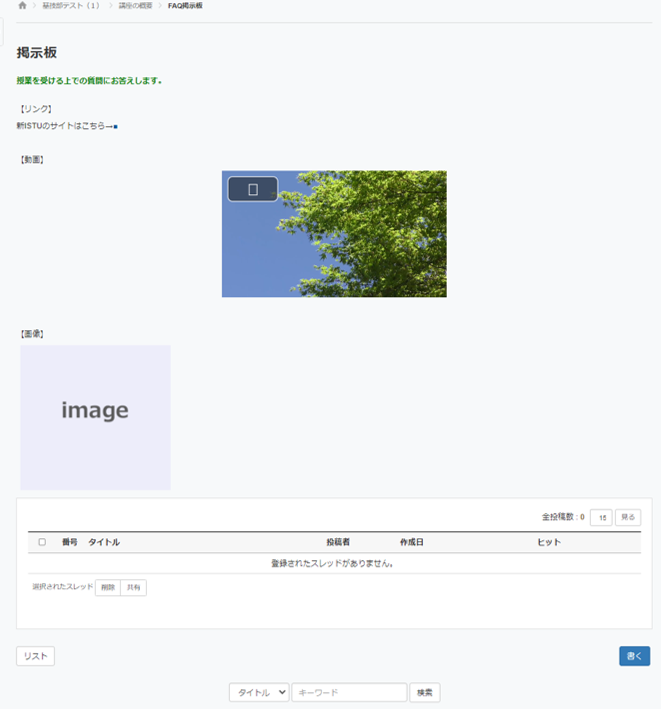
Example
Modify text, link to URLs, and insert videos and images in the description section of the Default Board.
Register the materials you want to distribute to students, such as PDF, Word, PowerPoint, etc.
Fill in the required information and click Save and Return to Course(保存してコースに戻る) to confirm.
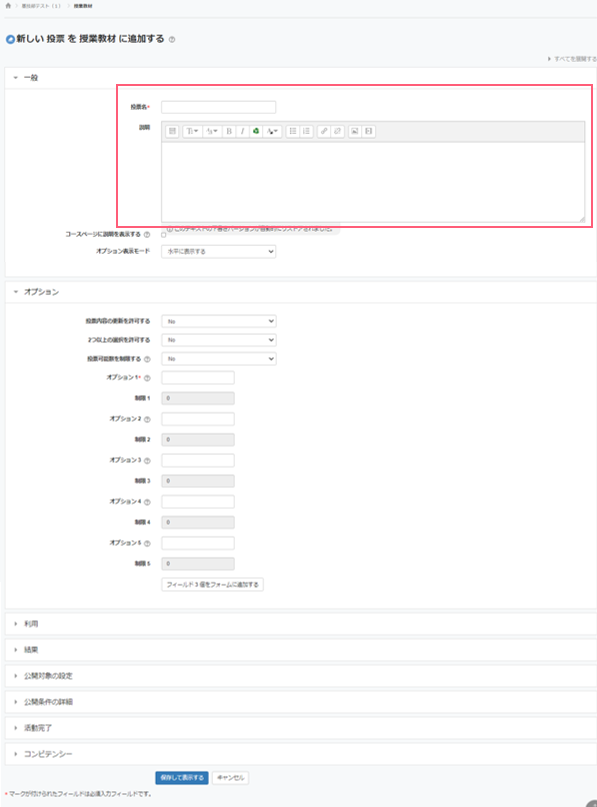
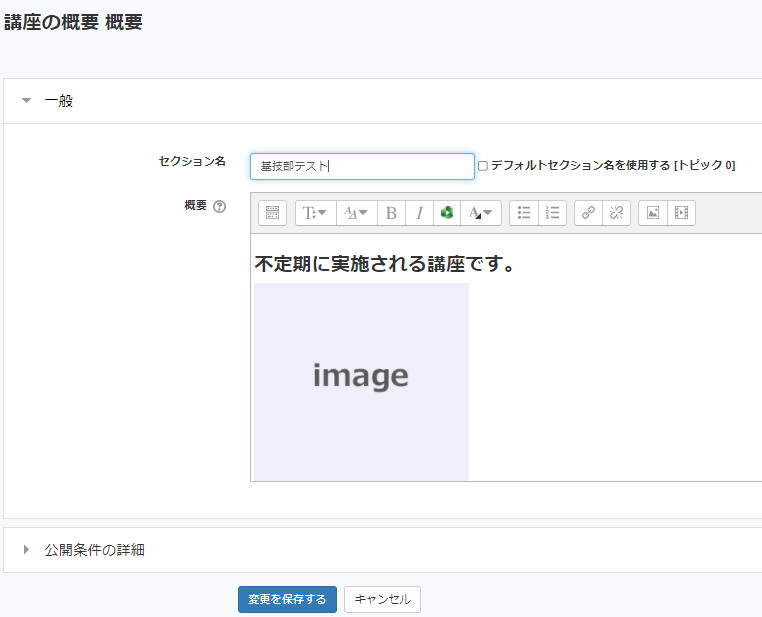
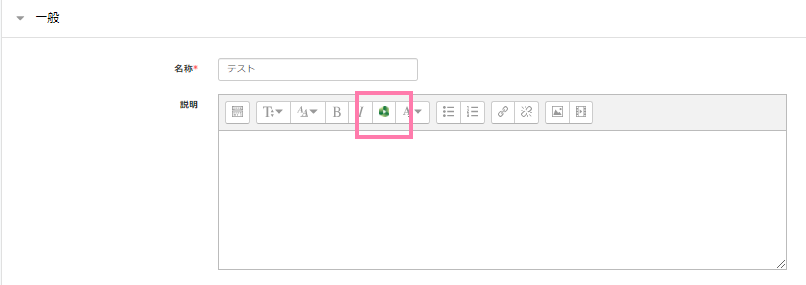
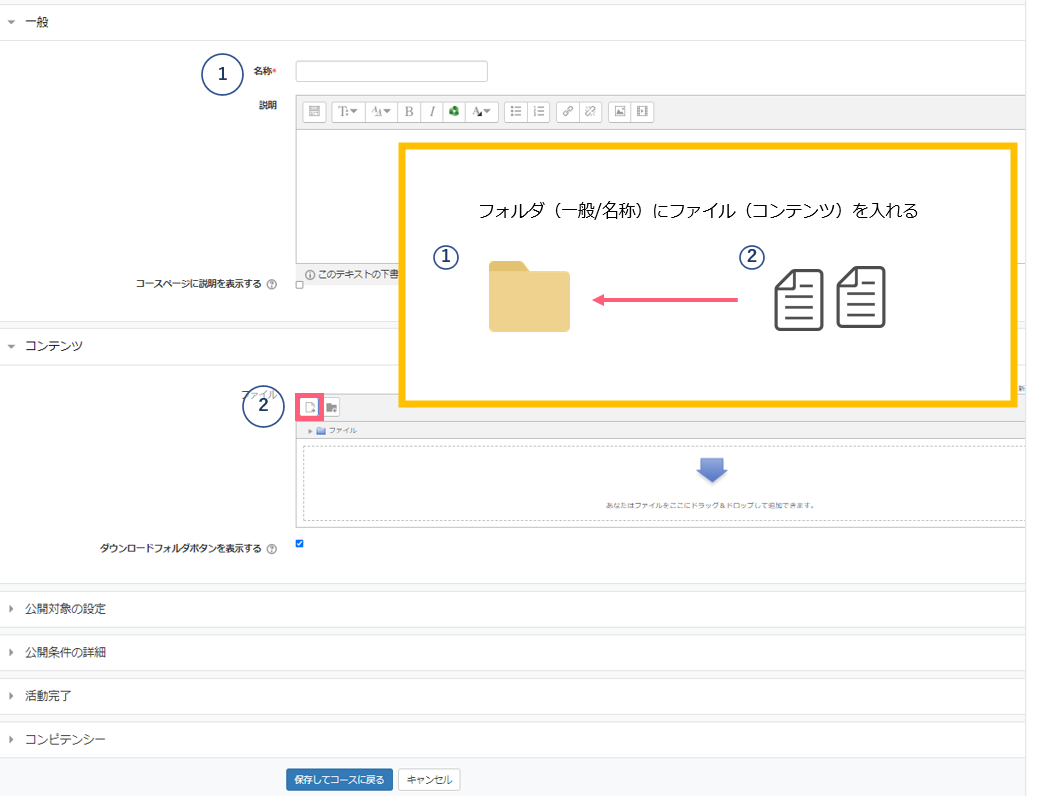
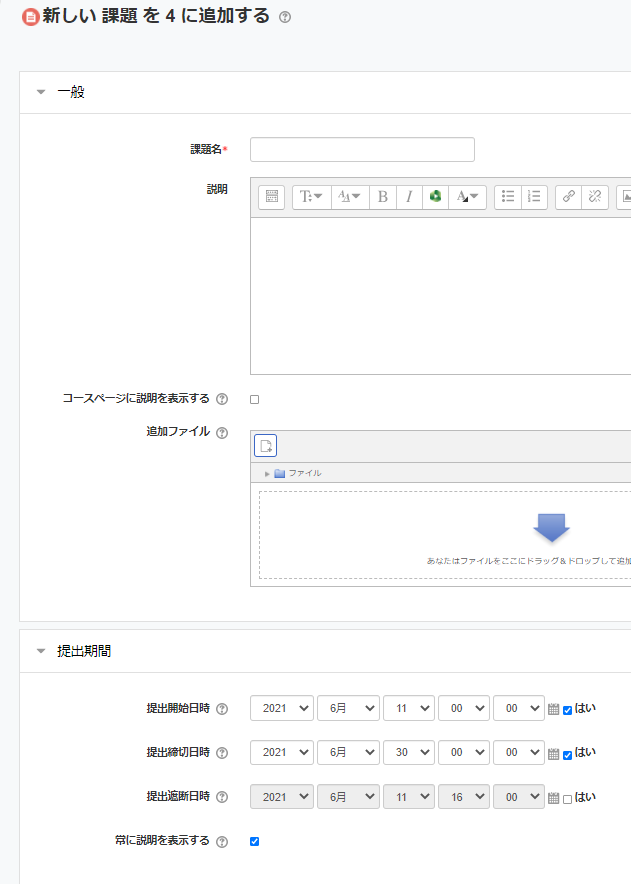
General(一般)
Enter a title and description for the file to be uploaded. If you want the description to appear on the course page, check the checkbox below the description field.
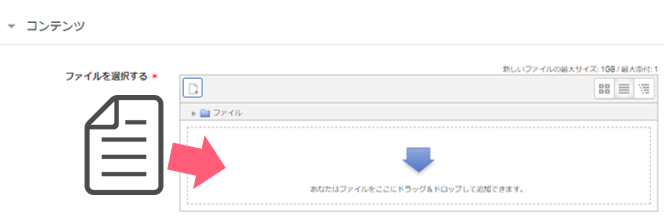
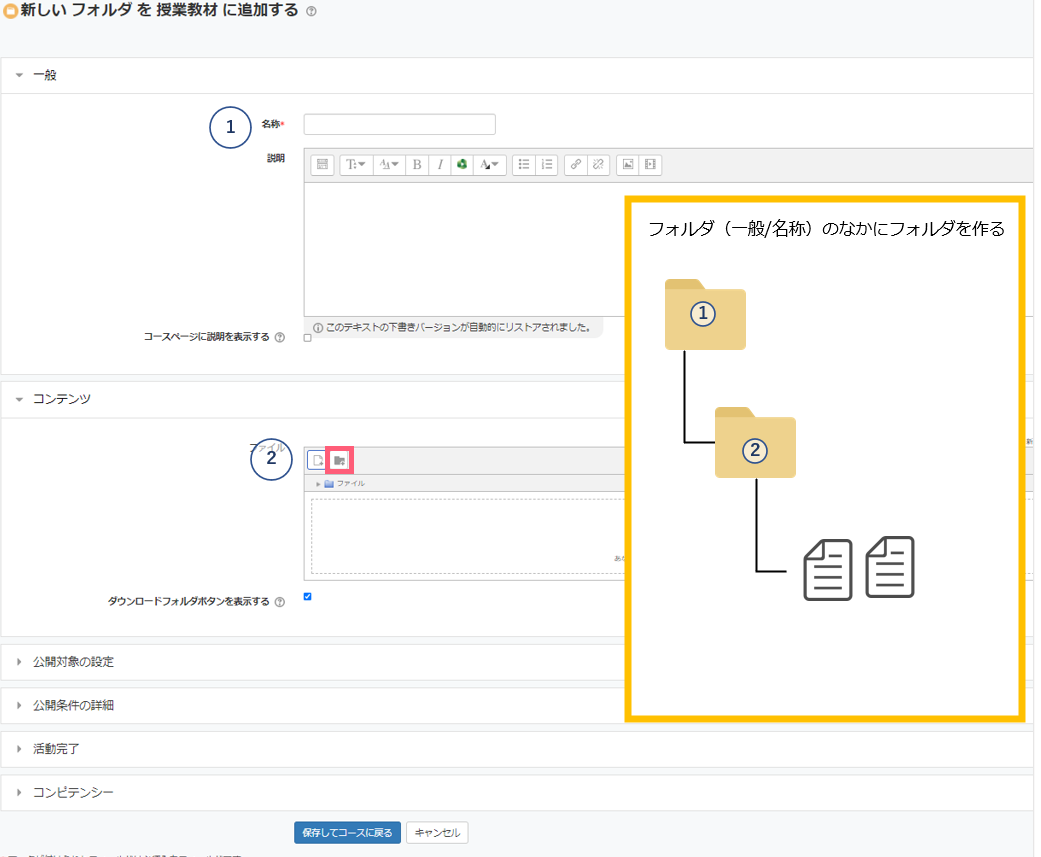
content(コンテンツ)
Drag and drop files or click on the icon in the upper left corner and select the appropriate file.
drag and drop
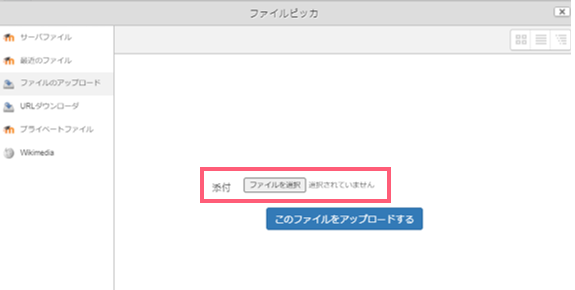
Upload files from the top left icon
Select the file.
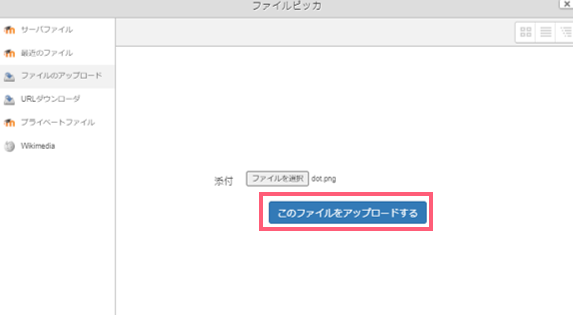
Click Upload this file(このファイルをアップロードする).
After uploading, the icon in the upper left corner will change to Download.
Display settings(表示設定)
If you select "In popup" in the display settings, only the following extensions can be displayed in the browser. You can register other files, but they will be downloaded. hwp, doc, docx, xls, xlsx, ppt, pptx, pdf
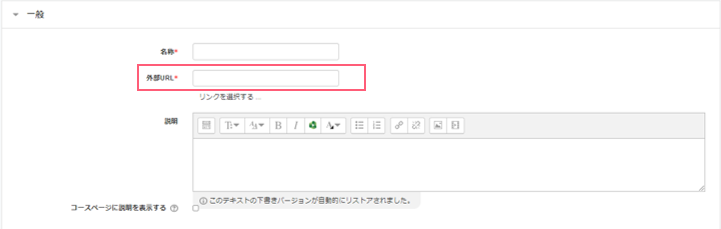
You can share and view links to articles and external sites that are related to your class.
The name and external URL are required fields. Other items can be set as needed. (By default, external URLs will open in a new window.
Register uploaded videos to Google Drive.
Go to Google Drive and get the link to the uploaded video, which will take you to Google Drive.
Enter the URL you retrieved and click "Save and return to course(保存してコースに戻る)".
For video files, you can use Panopto, a video platform.
Videos that have already been uploaded to "Panopto" can be called up from .
See the Panopto guide on using "External Tools".
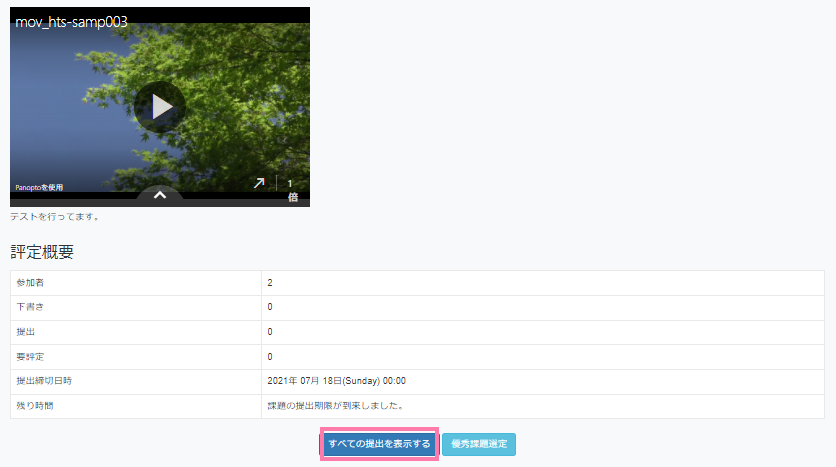
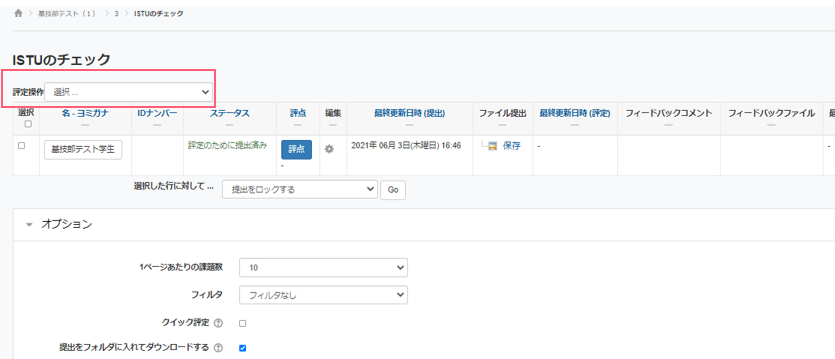
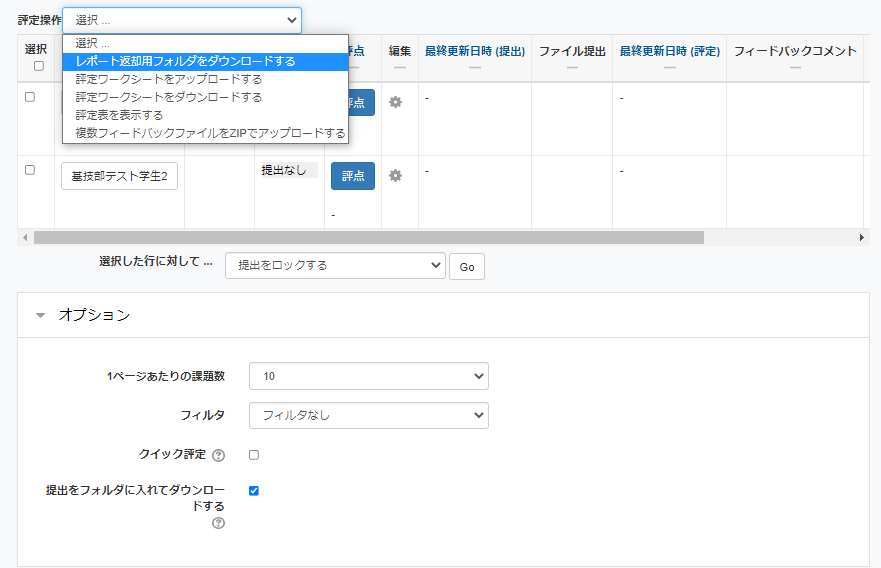
Select "Download all submissions(すべての提出をダウンロードする)" from "evaluation(評定操作)".
It will be downloaded in Zip format.
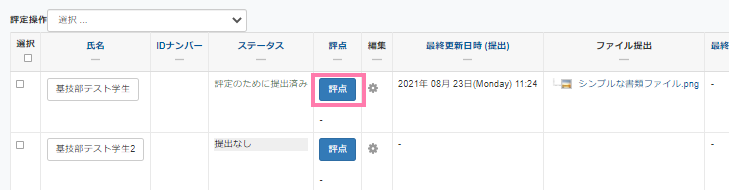
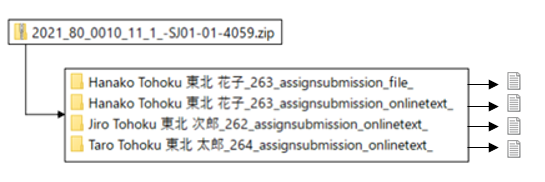
In the downloaded zip folder, you will find a folder for each student.
In addition, each folder contains files for submissions.
・ assignsubmission_file_(File submissions)
・ assignsubmission_onlinetext_(Online text/HTML file)
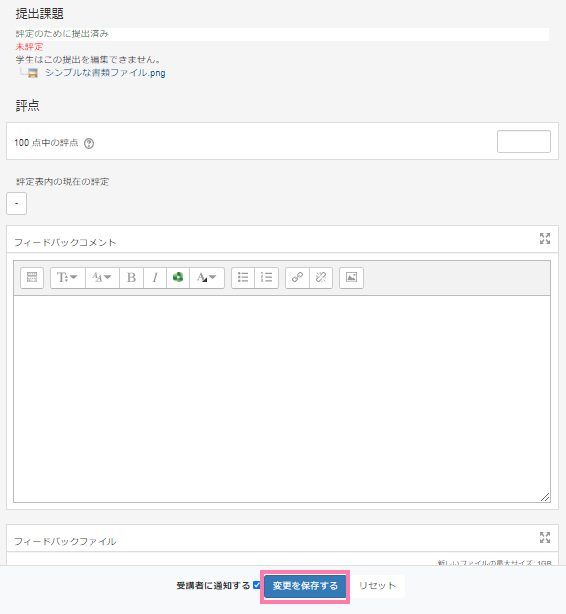
You can comment directly on the downloaded submission files, or put the separately prepared files for feedback, etc. into each student's "assignsubmission_file_" folder.
After the feedback process is complete, compress the file in Zip format.
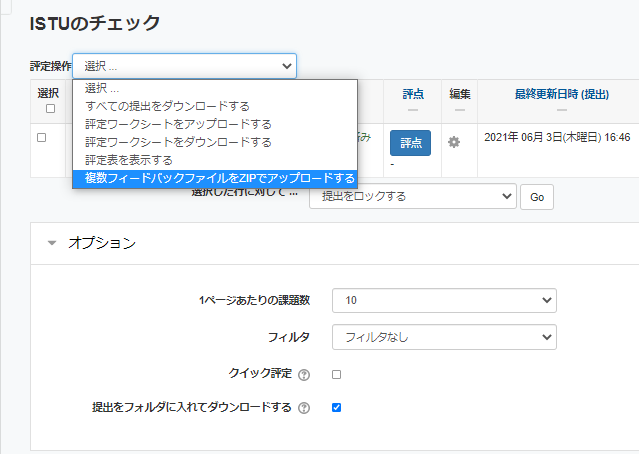
In "評定操作", select "Upload multiple feedback files in a ZIP (複数フィードバックファイルをZIPでアップロードする)".
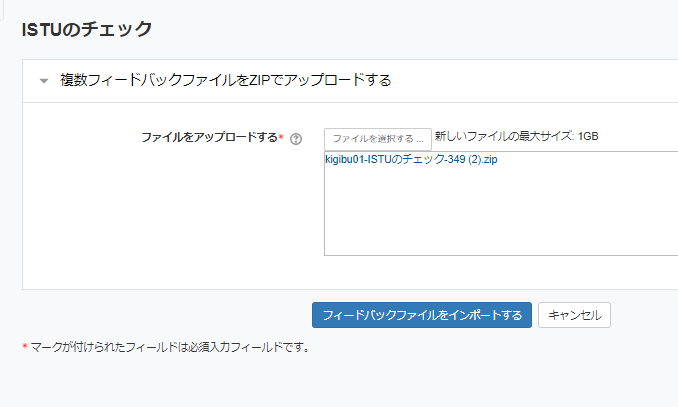
Drag and drop the Zip file you created. Click Import Feedback File(フィードバックファイルをインポートする)
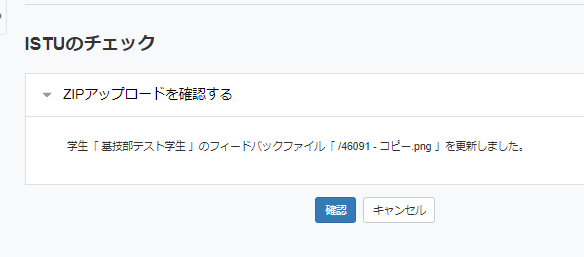
A list of files will be displayed. If there are no problems, click Confirm(確認).
Once you upload a file with the same name, it will be overwritten.
Click "Continue(続ける)" when the results are displayed.
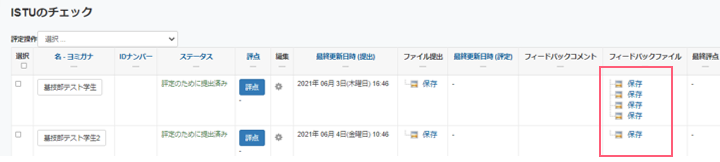
The uploaded files will be displayed in the "Feedback files(フィードバックファイル)" column for each student.
sup.
You can create a feedback file even if the assignment has not been submitted.
Select "Download Report Return Folder(レポート返却用フォルダをダウンロードする)" from the evaluation(評定操作) menu.
Unzip the Zip folder for feedback. The rest of the steps are the same.
注意
Please note that some of the folder names will not work properly if you change them.
Do not edit the marker part in particular.
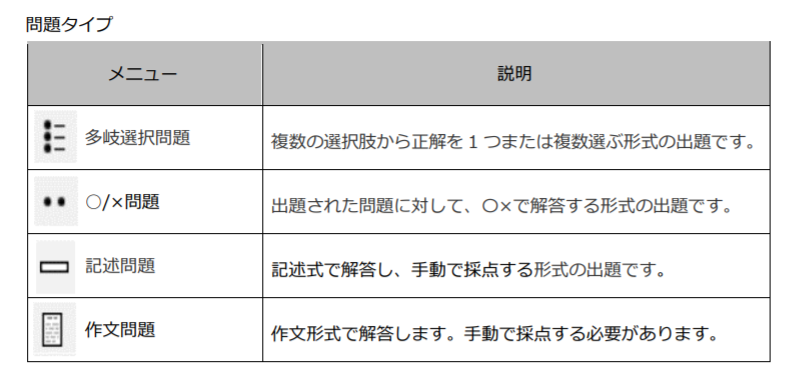
You can create questions in a variety of formats. Question Bank Questions from the "Question Bank" can be reused for multiple Quiz.
Click on Quiz(小テスト).
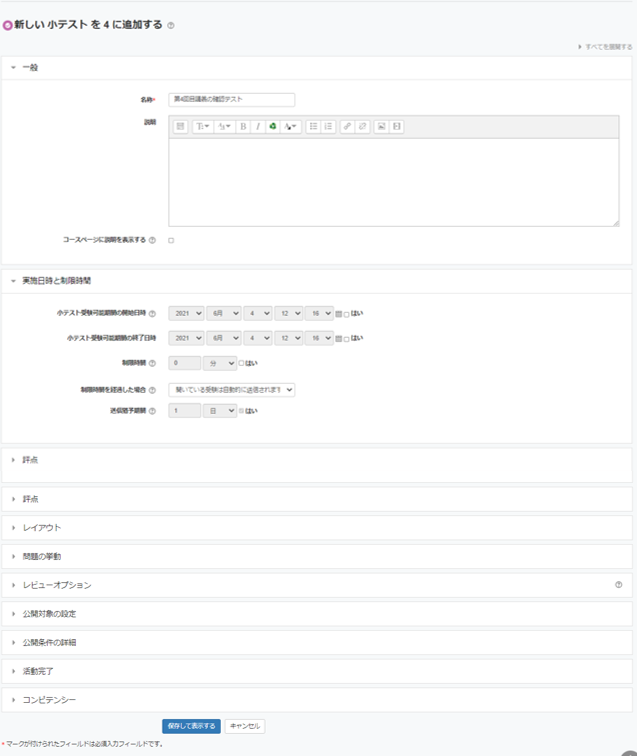
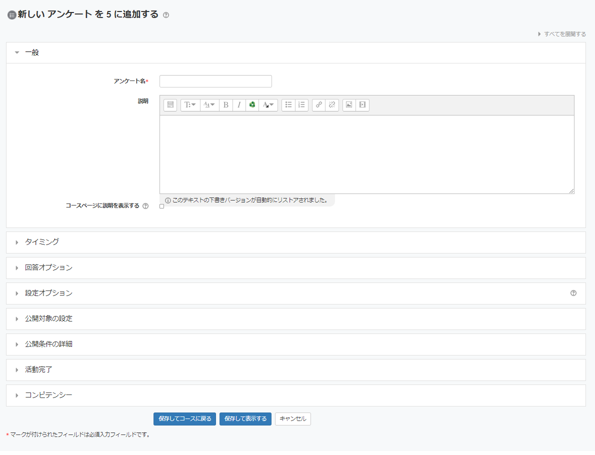
All fields except "Name" are optional.Configure the necessary sections and click "Save and Display(保存して表示する)".
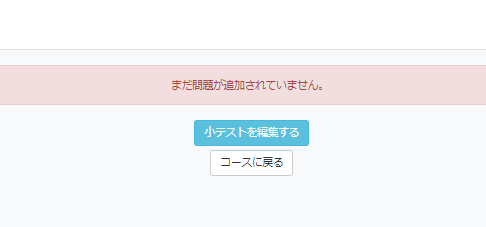
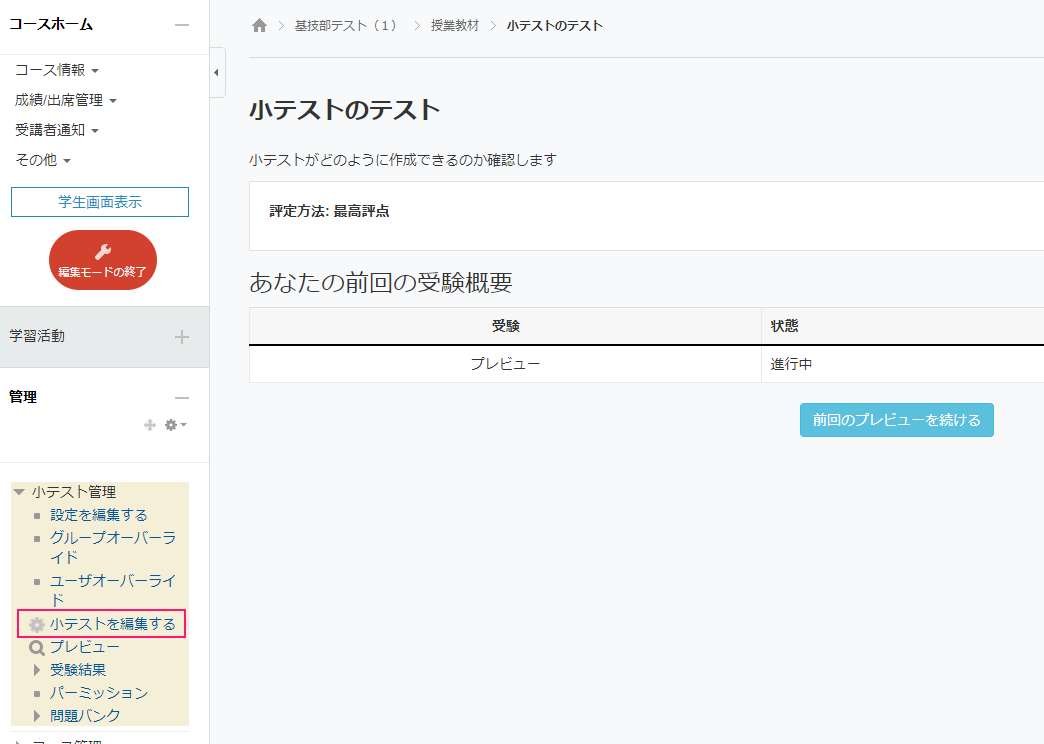
Click on the "Edit Quiz(小テストを編集する)" button.
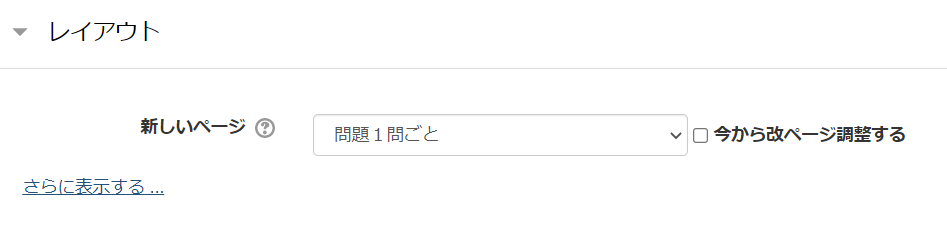
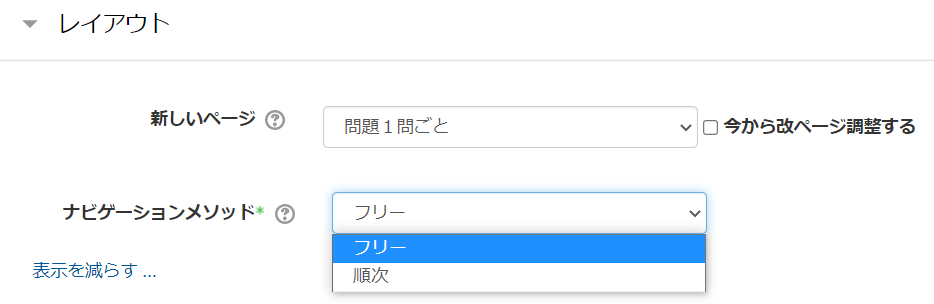
Click "Show more(さらに表示する)" in the layout and choose a navigation method if necessary.
Free(フリー)
You can do the quiz questions in any order you want. You can go back or skip a question.
Do it in order(順次)
Solve the problems in order. Once you move on to the next problem, you cannot go back to the previous problem.
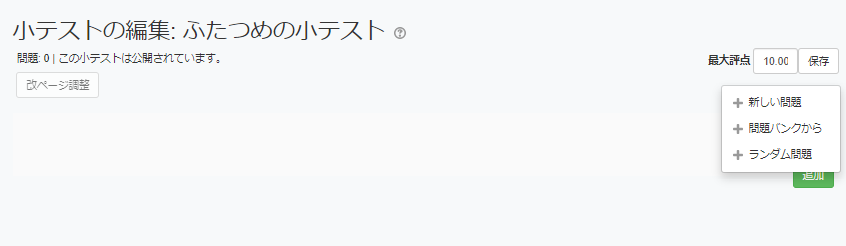
Click Add(追加) and select "New Problem(新しい問題)". If you want to add a problem that has already been created, select "From Problem Bank(問題バンクから)".
sup.
The questions created by the new question will be saved in the question bank.。
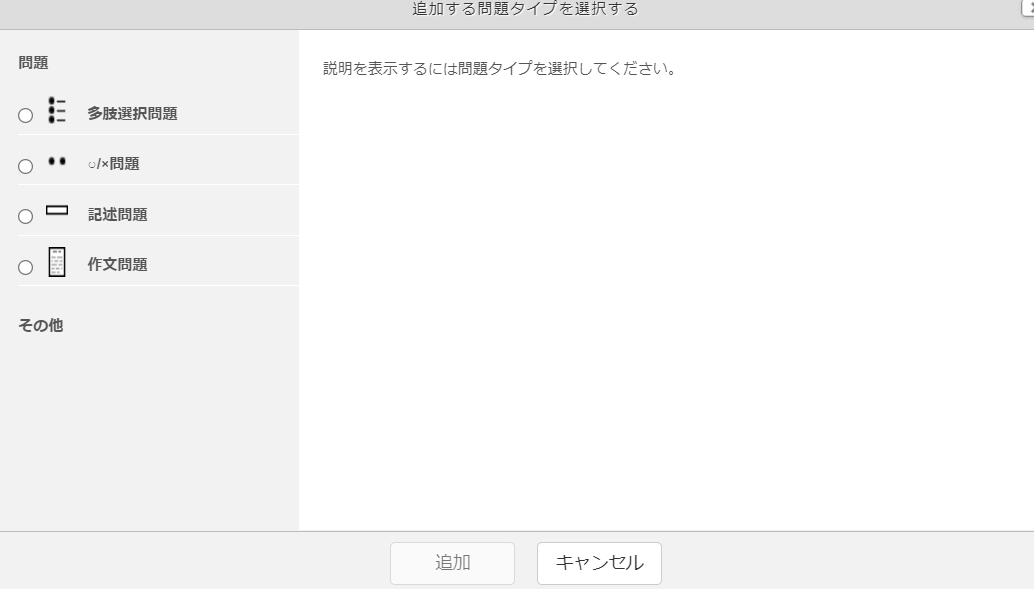
Select the questions you want to create and click "Add(追加)".
When you create a new question, it will be saved in the question bank.
sup.
The question bank (問題バンク)allows you to accumulate questions that you have created. If a faculty member has more than one course, they can also be reused across course boundaries.
Caution
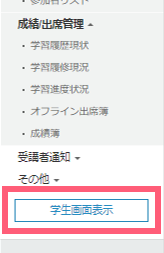
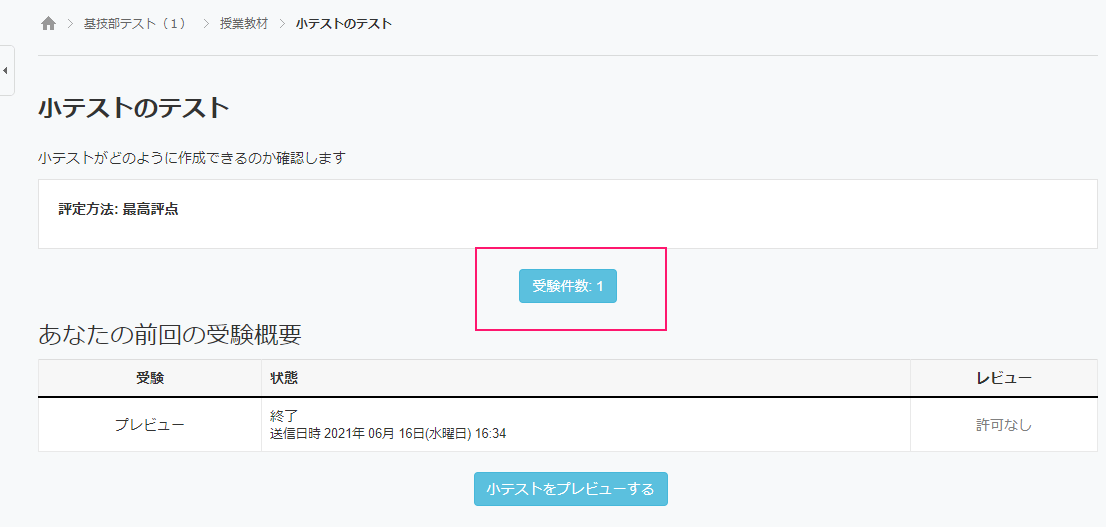
Please note that if you switch to the student's screen in the student screen display and answer the questions, the results will be reflected in the student's screen.
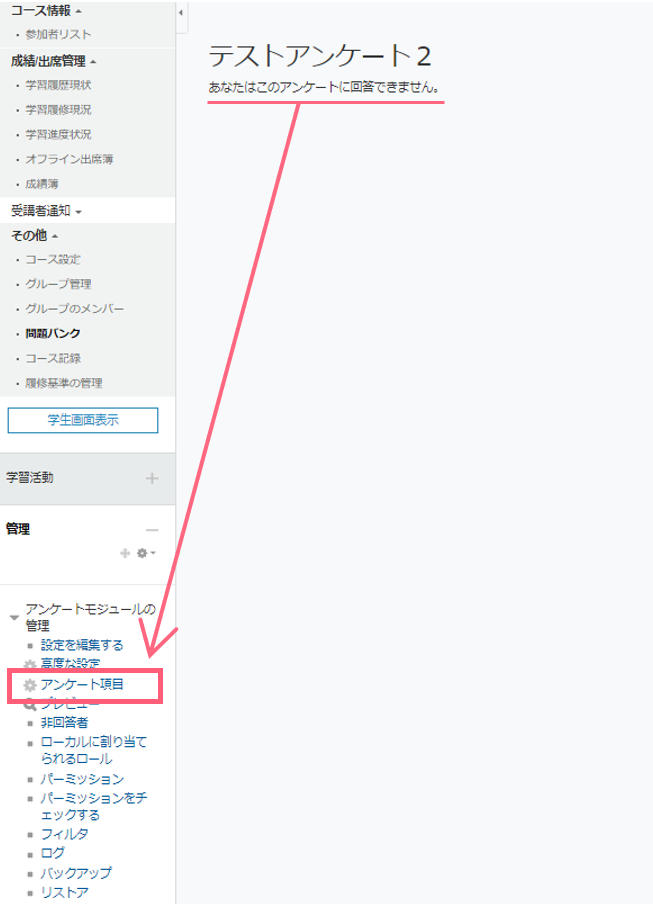
Click on the quiz(小テスト) you want to edit after creating it, and select "Edit quiz(小テストを編集する)" from the left menu.
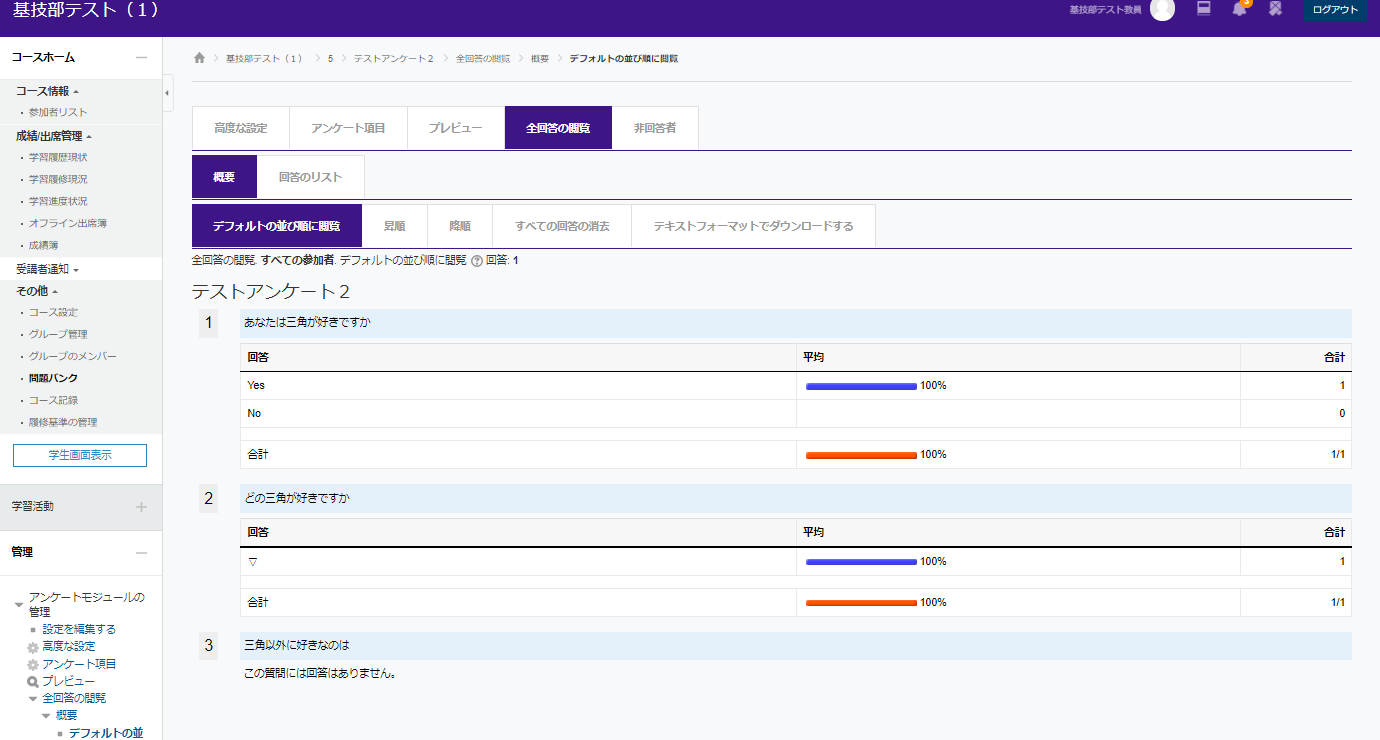
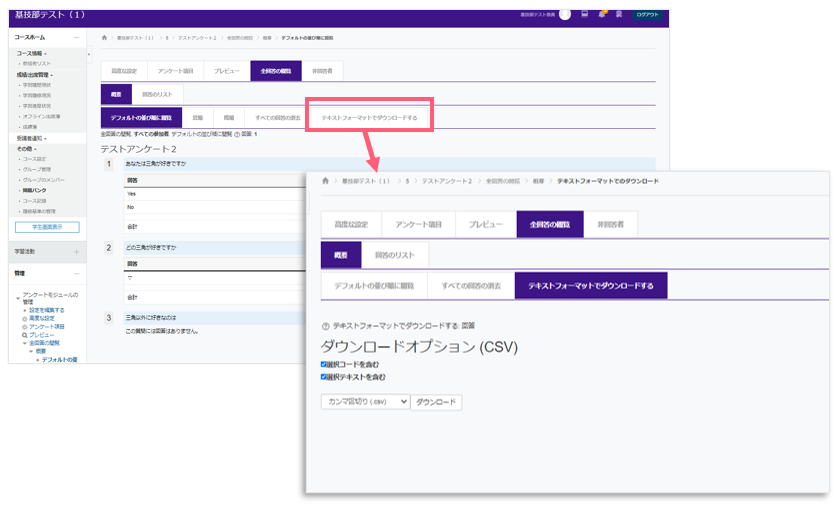
Grading of Quiz
True/false Quiz, multiple choice, fill-in-the-blank questions, etc. are automatically graded and the results can be checked immediately. (Short answer questions will be graded manually after the grader has checked them directly.
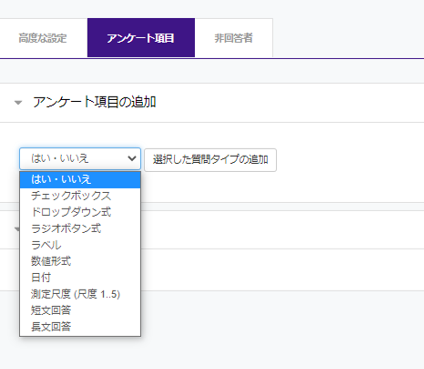
e.g.)Create a "yes/no" question and display the next question only if "yes" is selected.
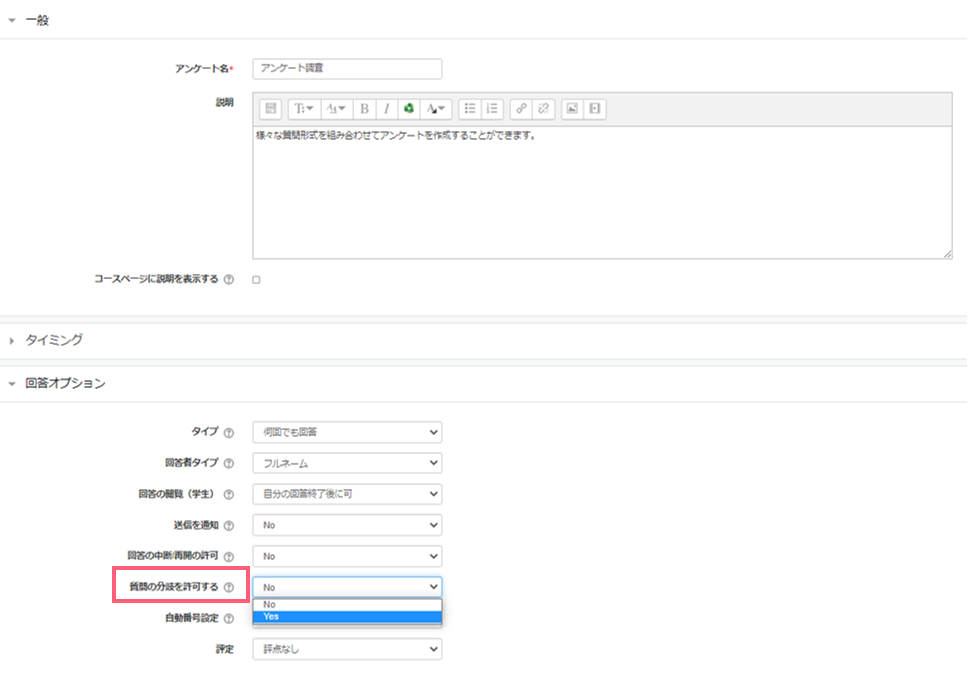
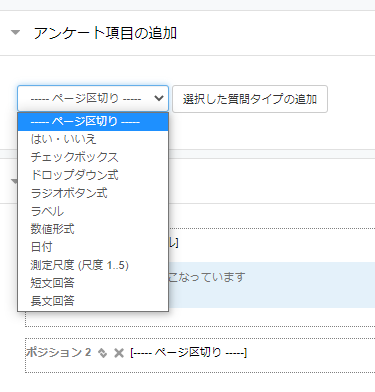
Display the "Answer Options(回答オプション)" in the Questionnaire Creation screen. Select "Yes" for "Allow questions to branch(質問の分岐を許可する)". Click "Save and Display(保存して表示する)".
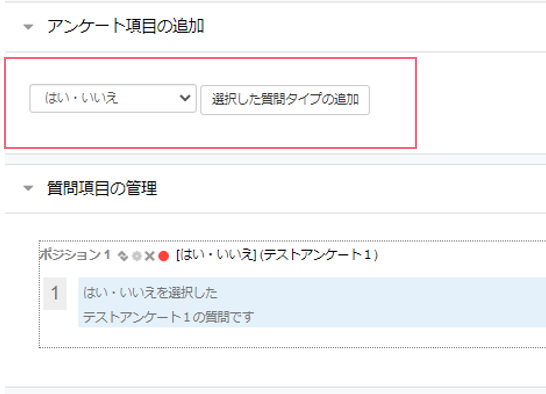
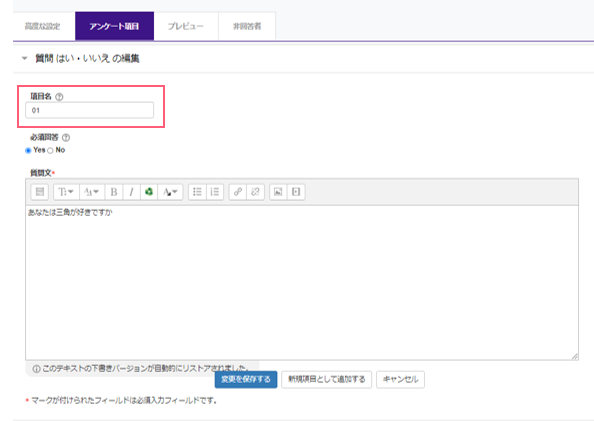
Create a "yes/no" question.
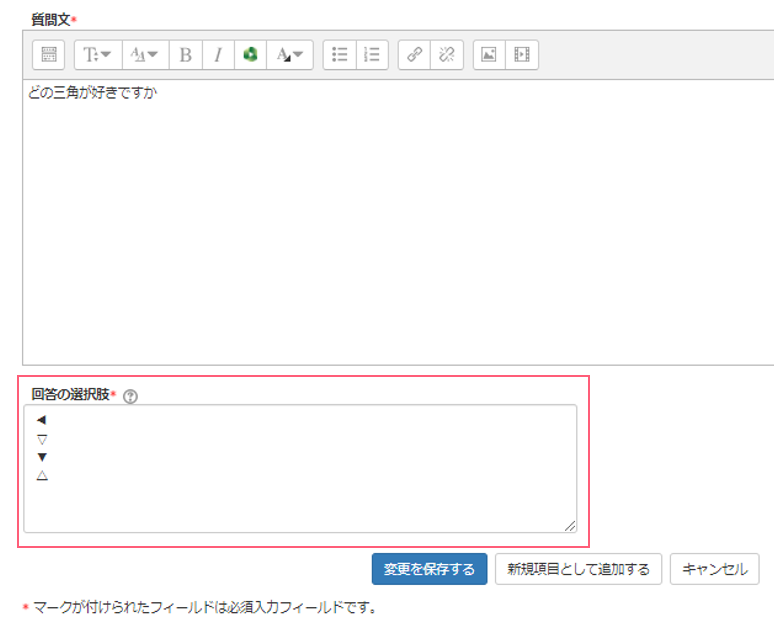
To create a branching question, enter any string in the "項目名" field. This will be selected in the second and subsequent questions, so make sure it is easy to understand.
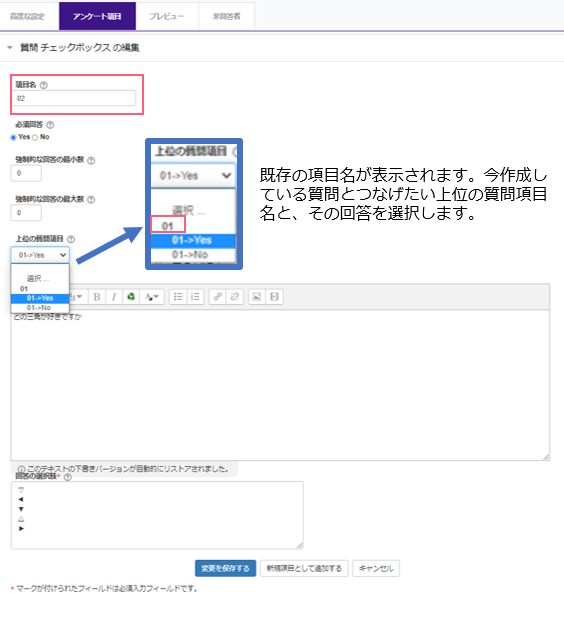
Create a second question.
As in the first step, enter the "項目名" as desired. The name of the item that will be the source of the branch will be displayed, so select the part you want to branch to. Enter the other necessary information and click "Save changes(変更を保存する)".
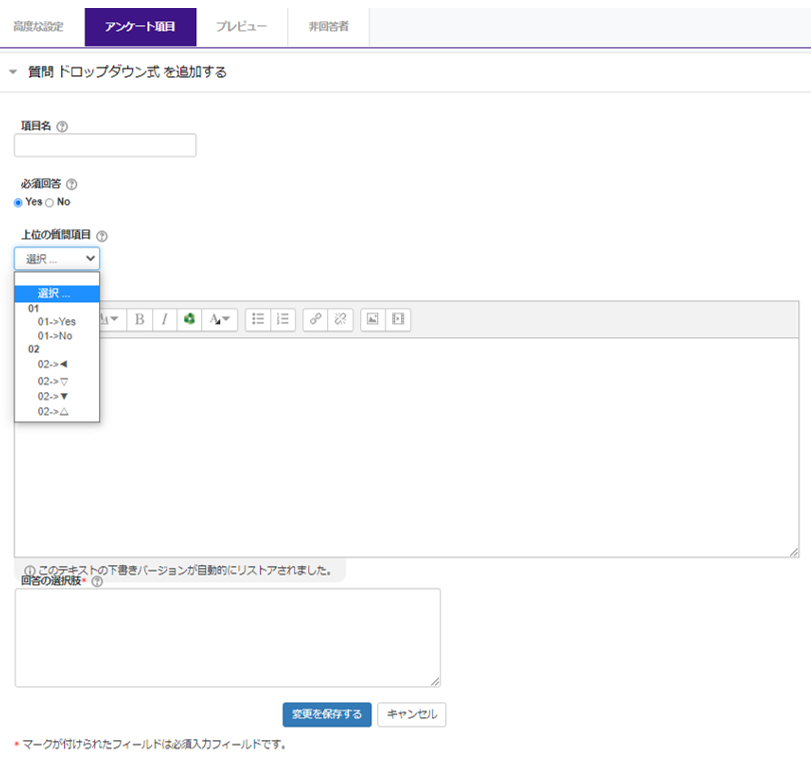
sup.
As you create more questions and branch out, the number of item names displayed in the "Top Questions(上位の質問)" section will increase, and you can select any item you want.
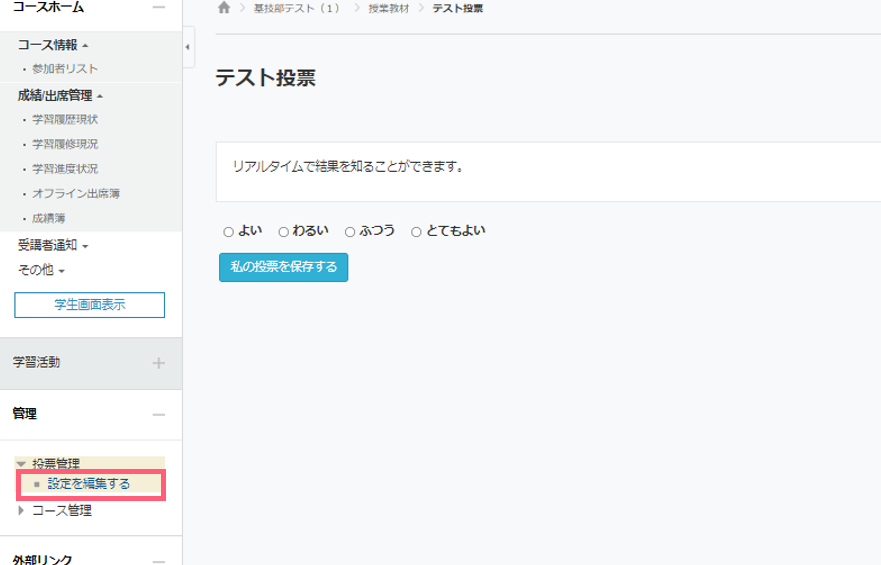
When you want real-time responses in your class, you can use "Choice[投票]".
This function is equivalent to the "clicker" used as one of the tools for teaching.
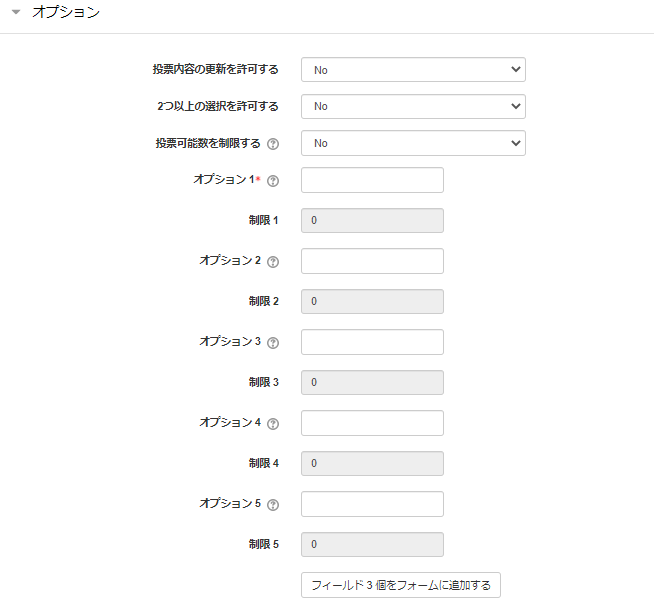
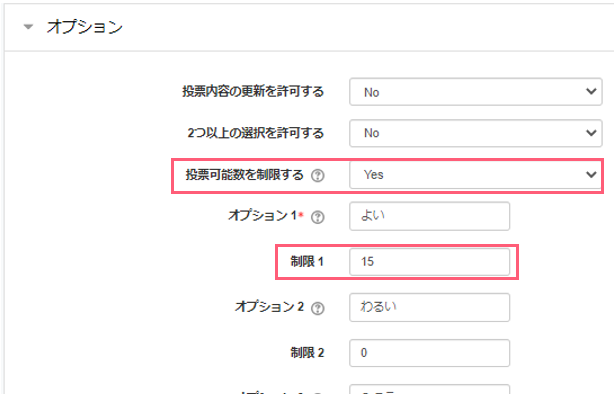
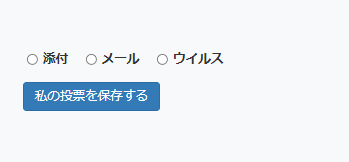
If you set "Limit the number of connections allowed" to "Yes", you will be able to enter each option.
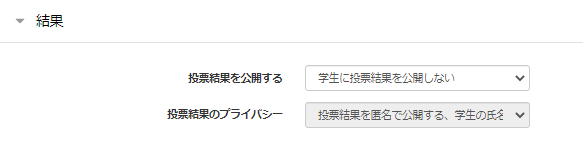
You can decide whether to release the voting results to the students. When you are done with the other necessary settings, click Save and display (保存して表示する).
The voting screen you have created will be displayed. If you want to edit it again, click "Edit settings (設定を編集する)" in the left menu.
Caution
Note that if you click on "Save my choice (私の投票を保存する)", even the creator can vote.
Contact Us
Please call or email me if you need help with ISTU.


 Default Board(掲示板)
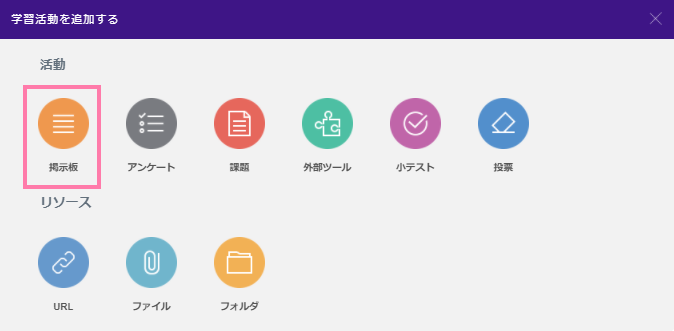
 File(ファイル)
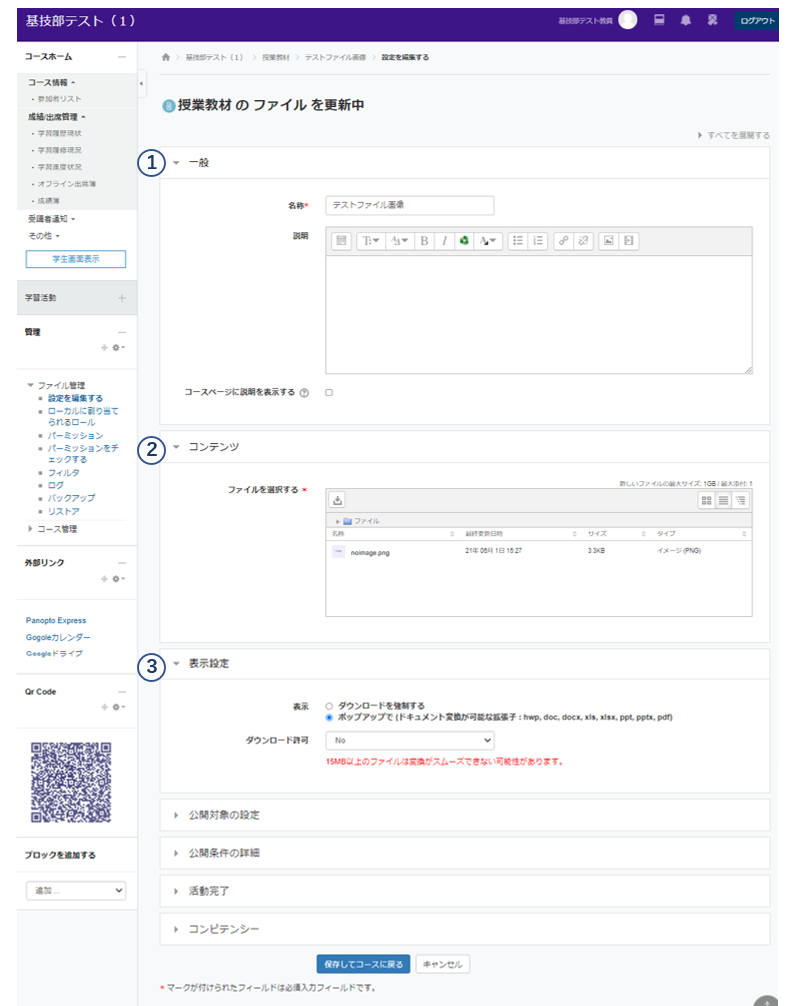


 Folder(フォルダ)
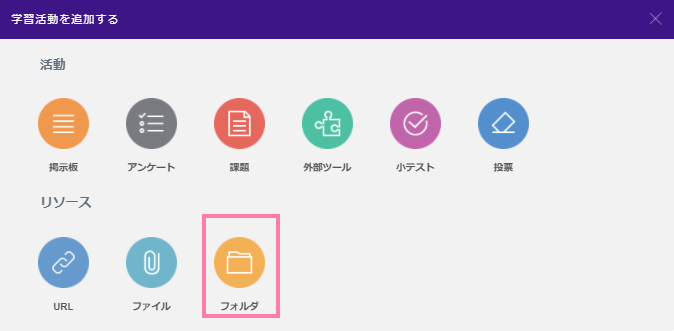
 URL URL Link Registration(リンク登録)
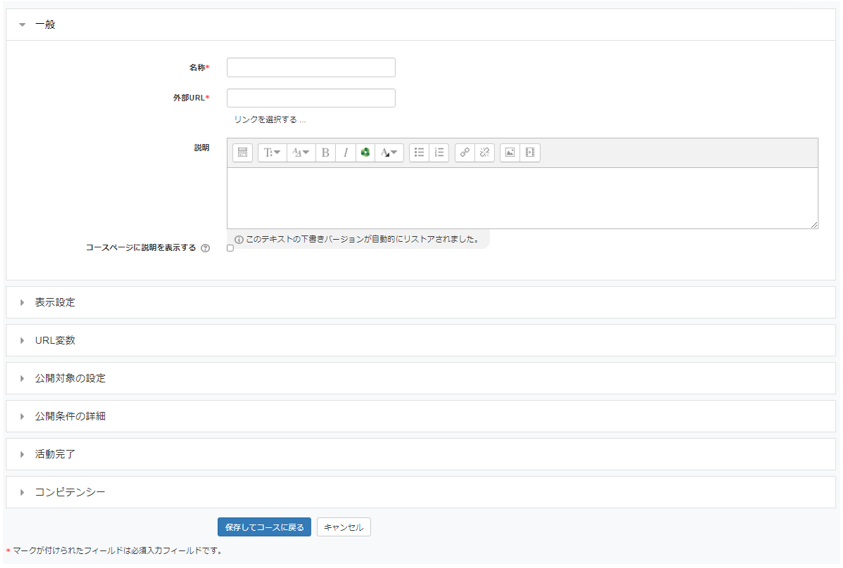

 .
.
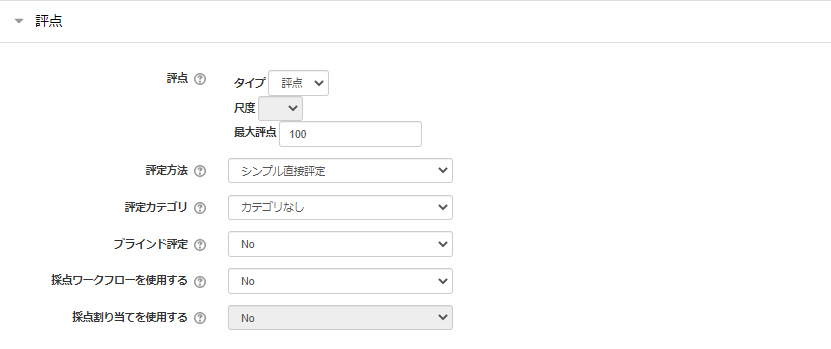
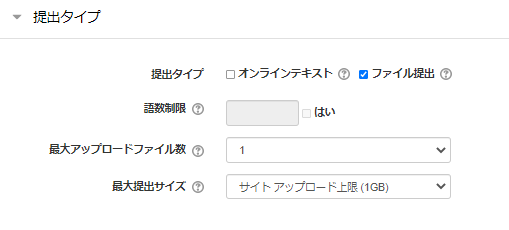
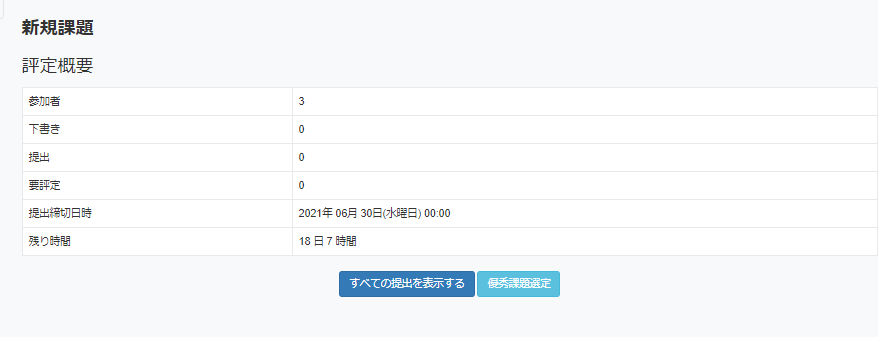
 Assignment(課題)
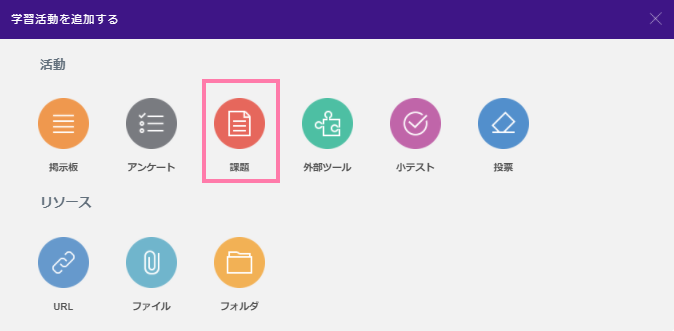


 Quiz(小テスト)
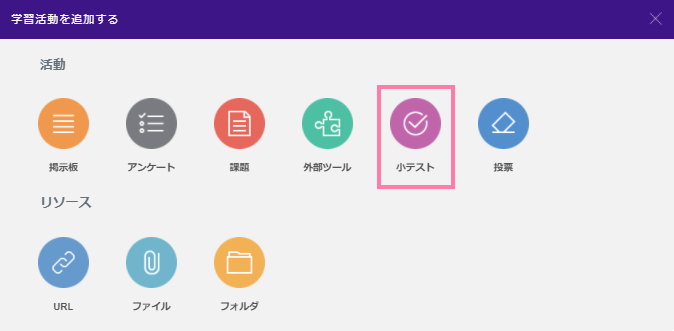
 Questionnaire(アンケート)
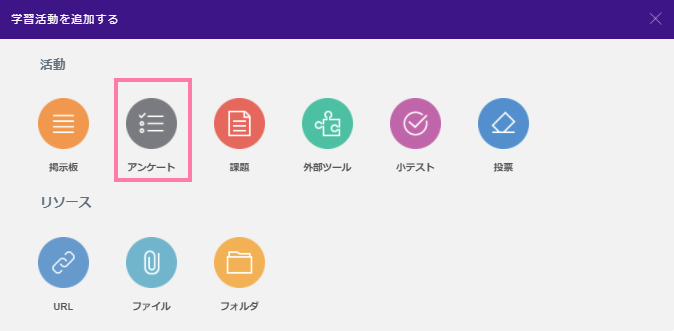


 Choice(投票)